How to Enable Post Split Pagination In Blogger
When you publish long articles in Blogger, it can sometimes look overwhelming for readers. A big block of text may also increase bounce rate as visitors may not feel like scrolling all the way down. To solve this, you can use post split pagination in Blogger.
Post split pagination helps you divide a single long article into multiple smaller pages. Readers can then navigate through the post step by step using Next and Previous buttons. This not only makes your content easier to read but also increases page views and engagement.
In this guide, I’ll explain what post split pagination is, why it’s useful, and how you can enable it in your Blogger blog.
What is Post Split Pagination?
Post split pagination means dividing one article into two or more sections and displaying them on different pages. For example:
- Page 1 → Introduction and first part of the article
- Page 2 → Middle section
- Page 3 → Conclusion
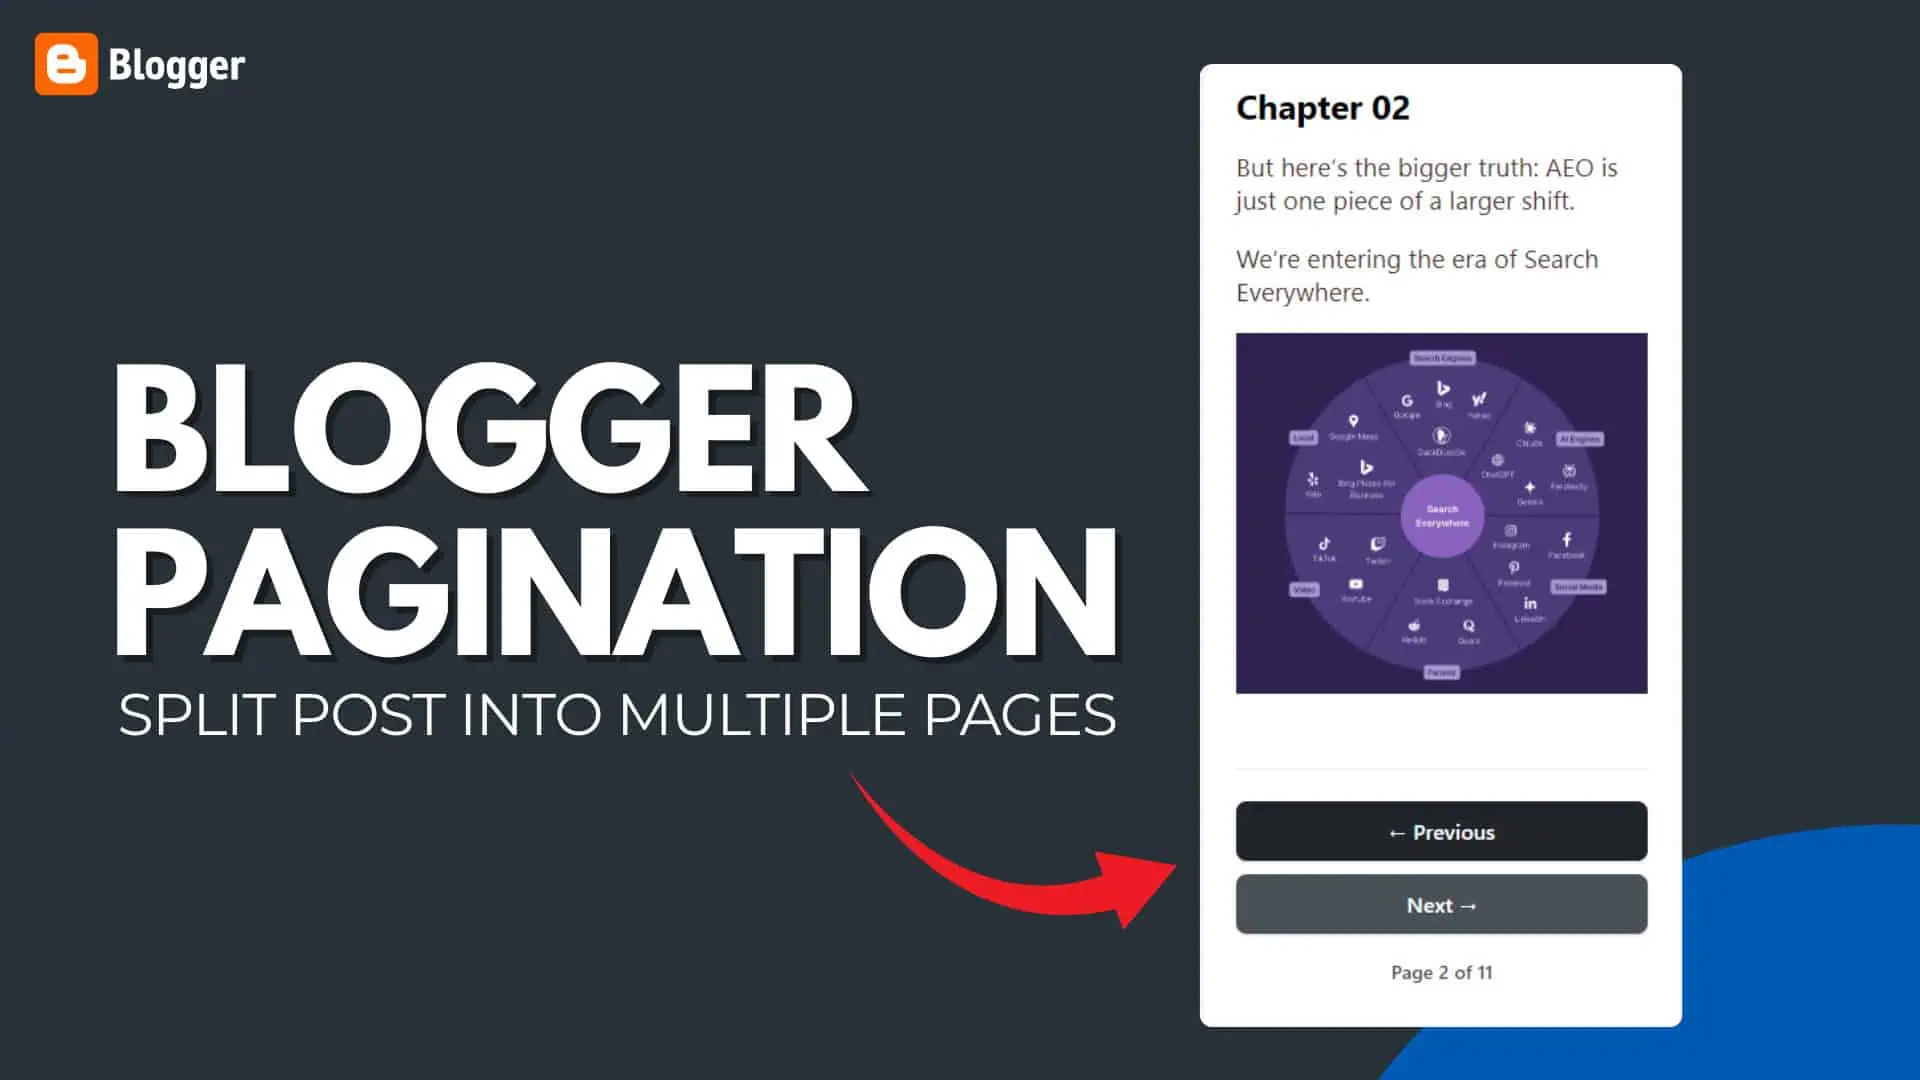
At the bottom of each page, the reader will see navigation links such as Next Page or Previous Page to move between sections.
Why Use Post Split Pagination in Blogger?
Here are a few reasons why bloggers use post pagination:
- Better readability – Breaking down a long post makes it easier to follow.
- Improved user experience – Readers can digest the content in smaller parts.
- More page views – Each split section is treated as a separate page, which can increase your blog’s overall page views.
- Organized content – Useful for tutorials, guides, or step-by-step articles.
How to Enable Post Split Pagination in Blogger
Unlike WordPress, Blogger does not have a built-in option for post split pagination. However, you can achieve it using a simple code.
Method – 01 : Using Manual Post Pagination
<div id="post-content-wrapper">
  <div class="post-page" id="page-1">
    <h2>Content for Page 1</h2>
    <p>This is the first part of my amazing blog post.</p>
  </div>
  <div class="post-page" id="page-2" style="display:none;">
    <h2>Content for Page 2</h2>
    <p>And here's the exciting continuation!</p>
  </div>
  <div class="post-page" id="page-3" style="display:none;">
    <h2>Content for Page 3</h2>
    <p>The thrilling conclusion awaits you.</p>
  </div>
</div>

<div class="pagination-controls">
  <button id="prev-page" style="display:none;">
    <svg xmlns="http://www.w3.org/2000/svg" viewBox="0 0 24 24" width="20" height="20">
      <path fill="#fff" d="M15.41 7.41L14 6l-6 6 6 6 1.41-1.41L10.83 12z"/>
    </svg>
    <span>Previous</span>
  </button>
  <span id="current-page-info">Page 1 of 5</span>
  <button id="next-page">
    <span>Next</span>
    <svg xmlns="http://www.w3.org/2000/svg" viewBox="0 0 24 24" width="20" height="20">
      <path fill="#fff" d="M8.59 16.59L10 18l6-6-6-6-1.41 1.41L13.17 12z"/>
    </svg>
  </button>
</div>


<style>
.pagination-controls {
  display: flex;
  align-items: center;
  justify-content: center;
  font-family: Arial, sans-serif;
  margin-top: 25px;
  margin-bottom: 25px;
}

#current-page-info {
  font-size: 16px;
  color: #555;
  margin-right: 15px;
  font-weight: bold;
}

.pagination-controls button {
  background-color: #5d59ff;
  color: #fff;
  border: none;
  padding: 12px 24px;
  font-size: 14px;
  cursor: pointer;
  border-radius: 4px;
  transition: background-color 0.3s ease;
  outline: none;
  display: flex;
  align-items: center;
  gap: 8px;
}

.pagination-controls button:hover {
  background-color: #4b46c6;
}

.pagination-controls button span {
  font-weight: bold;
}

.pagination-controls button svg {
  vertical-align: middle;
}

#prev-page {
  margin-right: 20px;
}
</style>

<script>
  document.addEventListener('DOMContentLoaded', function() {
    var pages = document.querySelectorAll('.post-page');
    var currentPageIndex = 0;
    var totalPages = pages.length;

    var currentPageInfo = document.getElementById('current-page-info');
    var prevButton = document.getElementById('prev-page');
    var nextButton = document.getElementById('next-page');

    function updatePaginationDisplay() {
      pages.forEach(function(page, index) {
        if (index === currentPageIndex) {
          page.style.display = 'block';
        } else {
          page.style.display = 'none';
        }
      });
      currentPageInfo.textContent = 'Page ' + (currentPageIndex + 1) + ' of ' + totalPages;

      if (currentPageIndex === 0) {
        prevButton.style.display = 'none';
      } else {
        prevButton.style.display = 'inline-block';
      }

      if (currentPageIndex === totalPages - 1) {
        nextButton.style.display = 'none';
      } else {
        nextButton.style.display = 'inline-block';
      }
    }

    nextButton.addEventListener('click', function() {
      if (currentPageIndex < totalPages - 1) {
        currentPageIndex++;
        updatePaginationDisplay();
      }
    });

    prevButton.addEventListener('click', function() {
      if (currentPageIndex > 0) {
        currentPageIndex--;
        updatePaginationDisplay();
      }
    });

    updatePaginationDisplay();
  });
</script>
Method – 02 : Automatic Pagination Using Post Split Feature
<b:if cond='data:blog.pageType == "item"'>
/* --- Pagination Controls --- */
<style>
#pagination-controls {
display: none;
margin: 2rem 0;
padding-top: 1.5rem;
border-top: 1px solid #e9ecef;
justify-content: space-between;
align-items: center;
flex-wrap: wrap;
gap: 1rem;
}
#pagination-controls.visible {
display: flex;
}
#pagination-controls .nav-buttons {
display: flex;
gap: 1rem;
}
#pagination-controls button {
background-color: #212529;
color: #ffffff;
font-family: inherit;
font-size: 1rem;
font-weight: 600;
padding: 0.75rem 1.25rem;
border: none;
border-radius: 0.5rem;
box-shadow: 0 1px 3px 0 rgba(0,0,0,0.1), 0 1px 2px 0 rgba(0,0,0,0.06);
cursor: pointer;
transition: background-color 0.2s ease-in-out;
}
#pagination-controls button:hover {
background-color: #495057;
}
.disabled-btn {
cursor: not-allowed;
opacity: 0.6;
background-color: #6c757d !important;
}
#page-indicator {
color: #495057;
font-weight: 500;
font-size: 0.9rem;
text-align: center;
flex-grow: 1;
}
/* Mobile layout */
@media (max-width: 600px) {
#pagination-controls {
flex-direction: column;
align-items: center;
}
#pagination-controls .nav-buttons {
width: 100%;
}
#pagination-controls .nav-buttons button {
flex: 1;
}
#page-indicator {
order: 2;
width: 100%;
text-align: center;
margin-top: 8px;
}
.nav-buttons {
order: 1;
}
}
</style>
<script type='text/javascript'>
//<![CDATA[
document.addEventListener('DOMContentLoaded', function () {
// --- Use Blogger Post ID ---
const MORE_TAG_REGEX = /<span>\s*<!--more-->\s*<\/span>|<!--more-->/;
const POST_BODY_ID = 'post-body';
const postBodyEl = document.getElementById(POST_BODY_ID);
let paginatedContentEl, paginationControlsEl, prevBtn, nextBtn, pageIndicator;
if (!postBodyEl) {
console.warn(`Blogger Paginator: Element with id #${POST_BODY_ID} not found. Script will not run.`);
return;
}
let pages = [];
let currentPage = 0;
function createPaginationElements() {
paginatedContentEl = document.createElement('div');
paginatedContentEl.id = 'paginated-content';
paginatedContentEl.className = postBodyEl.className;
paginationControlsEl = document.createElement('div');
paginationControlsEl.id = 'pagination-controls';
paginationControlsEl.innerHTML = `
<div class="nav-buttons">
<button id="prev-btn">← Previous</button>
</div>
<span id="page-indicator"></span>
<div class="nav-buttons">
<button id="next-btn">Next →</button>
</div>
`;
postBodyEl.parentNode.insertBefore(paginatedContentEl, postBodyEl.nextSibling);
paginatedContentEl.parentNode.insertBefore(paginationControlsEl, paginatedContentEl.nextSibling);
prevBtn = document.getElementById('prev-btn');
nextBtn = document.getElementById('next-btn');
pageIndicator = document.getElementById('page-indicator');
}
function initPagination() {
const fullContent = postBodyEl.innerHTML;
if (MORE_TAG_REGEX.test(fullContent)) {
pages = fullContent.split(MORE_TAG_REGEX);
if (pages.length > 1) {
createPaginationElements();
postBodyEl.style.display = 'none';
paginationControlsEl.classList.add('visible');
currentPage = 0;
renderPage();
setupEventListeners();
}
}
}
function renderPage() {
paginatedContentEl.innerHTML = '<!-- Paginator Content -->' + pages[currentPage];
pageIndicator.textContent = `Page ${currentPage + 1} of ${pages.length}`;
updateButtonStates();
}
function updateButtonStates() {
prevBtn.disabled = currentPage === 0;
prevBtn.classList.toggle('disabled-btn', currentPage === 0);
nextBtn.disabled = currentPage >= pages.length - 1;
nextBtn.classList.toggle('disabled-btn', currentPage >= pages.length - 1);
}
function setupEventListeners() {
nextBtn.addEventListener('click', () => {
if (currentPage < pages.length - 1) {
currentPage++;
renderPage();
paginatedContentEl.scrollIntoView({ behavior: 'smooth', block: 'start' });
}
});
prevBtn.addEventListener('click', () => {
if (currentPage > 0) {
currentPage--;
renderPage();
paginatedContentEl.scrollIntoView({ behavior: 'smooth', block: 'start' });
}
});
}
initPagination();
});
//]]>
</script>
</b:if>Follow the Below video to Learn the step by step integration of these pagination code in Blogger website.
Things to Keep in Mind
- Do not overuse pagination. Only apply it on very long posts.
- Make sure the split is natural and does not break the flow of the content.
- Always check your post in mobile view to ensure buttons look good.
Post split pagination is a simple but effective way to improve readability on long blog posts in Blogger. This makes your content more organized, keeps readers engaged, and can even boost your blog’s page views.
If you still have doubts, do let me know in the comment section. So, I will update the code to fix that bug.
Don’t forget to Like & Subscribe Our YouTube Channel.