How to set up a custom domain for Blogger?
Are you having trouble connecting or setting up your domain with your Blogger account?
Don’t worry, I can help.
I will guide you through connecting a custom domain to your Blogger blog.
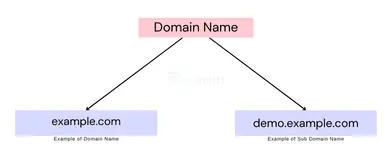
Just imagine you have a blog on Blogger, and you want it to have a cool website address like www.example.com instead of the default xyz.blogspot.com.
- If you do not have a domain name, you need to purchase one from a domain provider.
- If you are still facing problems with purchasing a domain name, you can read, How To Register A Domain Name In Namecheap.
- If you already have a top-level domain name, you can proceed.
Why should I use a custom domain on Blogger?
In the Blogger platform, You can create a free website with the sub-domain of blogspot.com.

It looks completely unprofessional and suspicious as most people use it for spam.

Using your own domain for your Blogger site can make it look more professional, help readers remember and find it, and also boost your Blogger Website SEO.
If you need a domain name and want to know how to get one, check out this article: How To Register A Domain Name In Namecheap.
List of advantages of using the custom domain on a blogger website:-
- Branding
- Better SEO and page ranking.
- High Chance of monetization like from Google Adsense.
- and Many more…
Now you know the benefits of having a custom domain in Blogger.
So, Let’s begin!
How to Set Up Blogger with a Custom Domain?

I’ll guide you through two ways to set up a custom domain for your Blogger site: one through your domain provider and the other using Cloudflare.
How to Connect Domain Name to Blogger by Domain Provider?
Here is the list of steps to connect domain name to blogger website:-
- Log in to your Blogger dashboard and go to the settings section.
- Enter your domain with www.
- Log in to your domain registrar and find the DNS management option.
- Click on Advanced DNS and add New Records.
- Select CNAME, and enter the information.
- Similarly, add the 2nd CNAME from Blogger and save it.
Follow these 6 Steps to connect your domain name to the blogger website.
- Log in to your Blogger dashboard and go to the settings section.
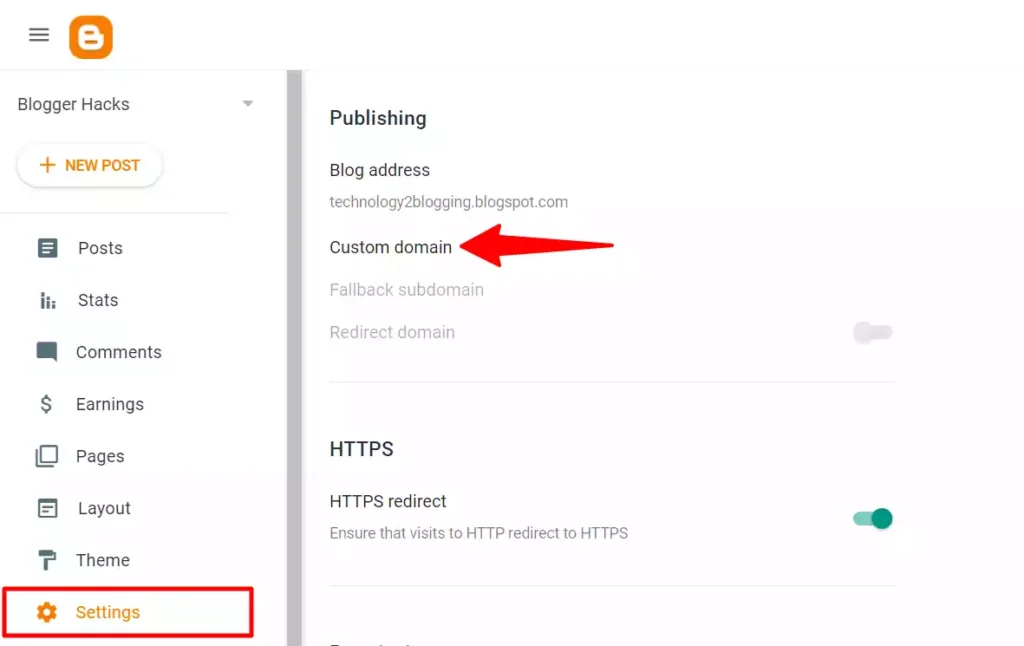
Under Publishing, You will see the option “Custom Domain“. Click on it.
- Enter your domain with www. (example:- www.your-domain.com)
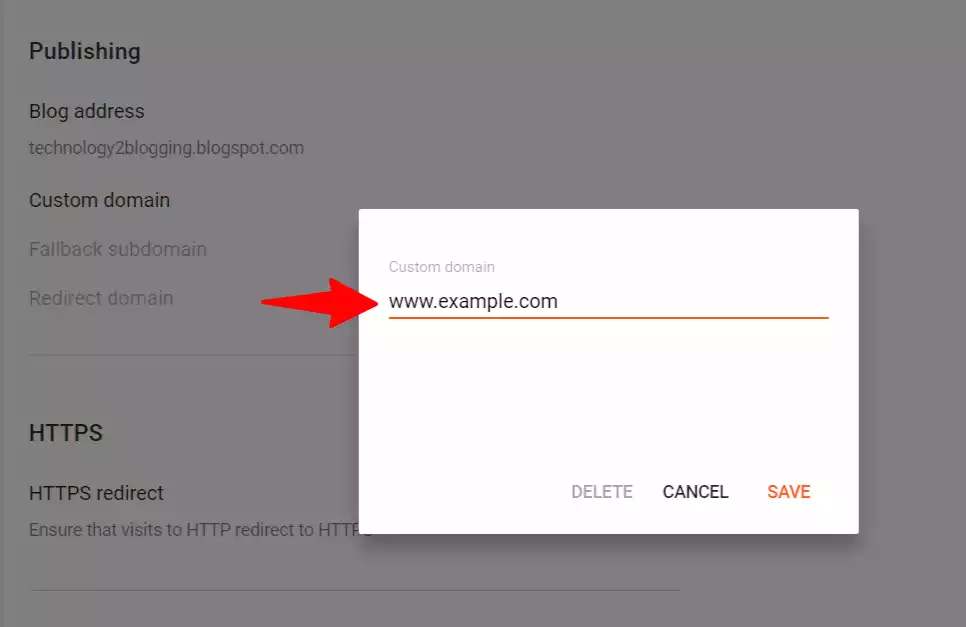
Now click on the save.
Now you will see an instruction like this where you will ask to add two CNAME in your Domain Registrar.
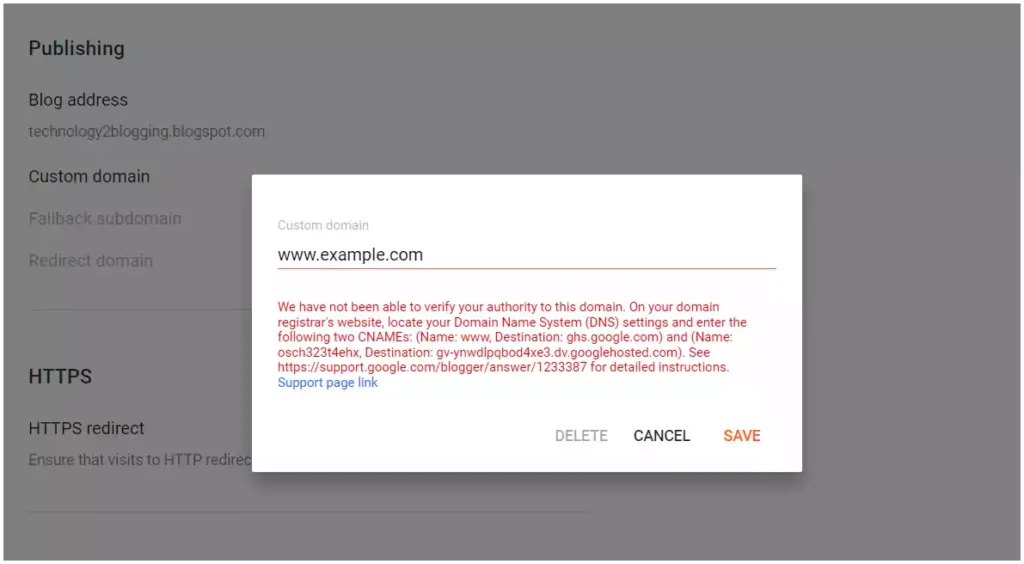
- Log in to your domain registrar and find the DNS management option.
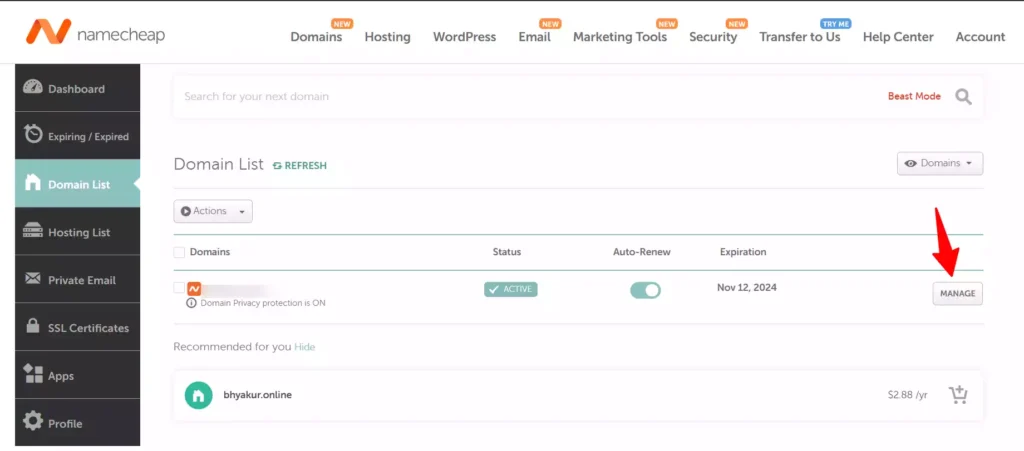
- Click on Advanced DNS and add New Records. (Check Screenshot Below)
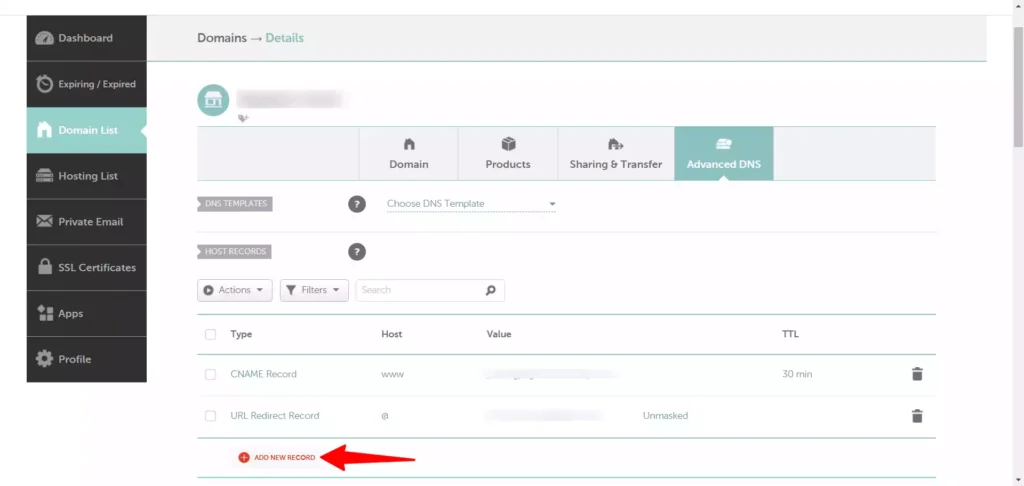
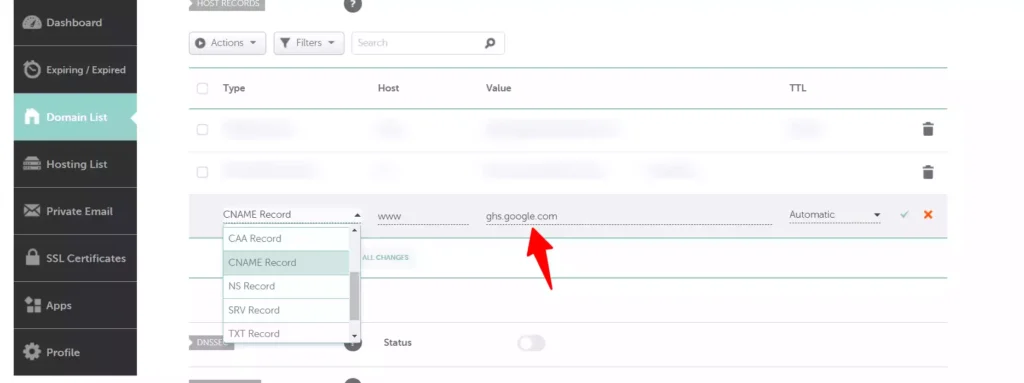
- Select CNAME, and enter the information.
- Similarly, add the 2nd CNAME from Blogger and save it.
Note: Copy this exactly from Blogger; a tiny typo can disrupt connecting your domain to the platform.
To make-sure your website redirects from the non-www version to the www version, add four A records to your domain.
This redirects users who access your site without the www prefix to the www version. For instance, if someone tries to visit example.com, they’ll be automatically directed to www.example.com.
To Fix this issue, create A records for these IP addresses:
- 216.239.32.21
- 216.239.34.21
- 216.239.36.21
- 216.239.38.21
After adding these four A records, it may take up to 24 hours to fully propagate the DNS records.
How to Connect Domain Name to Blogger using Cloudflare?
- Log in to Cloudflare and select the domain.
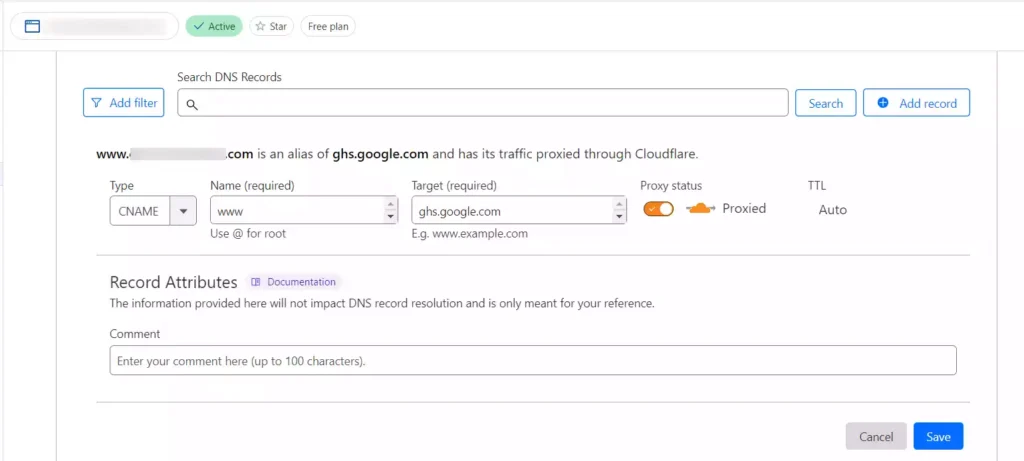
- Now go to the DNS > Records and add new records as shown in the below image.
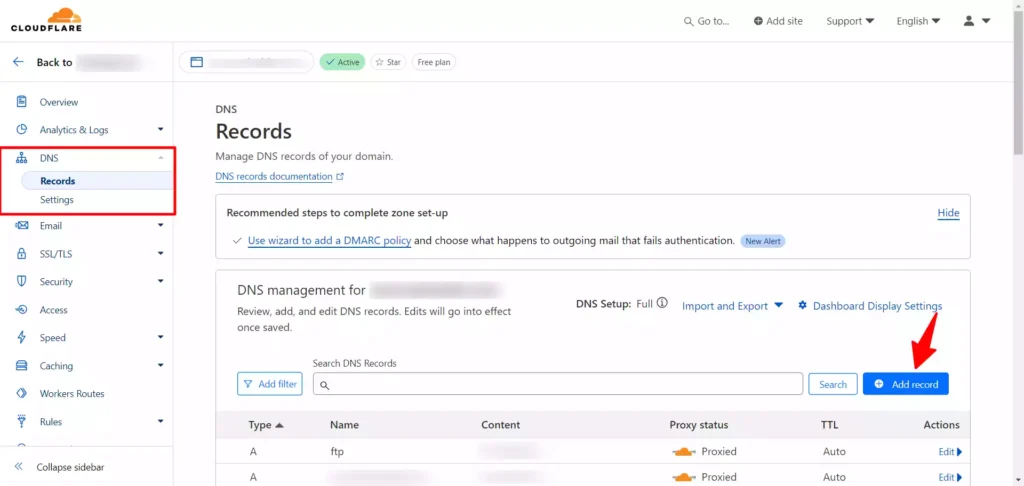
Now put www in the Name Field and On the target Field put ghs.google.com and Save the Record.
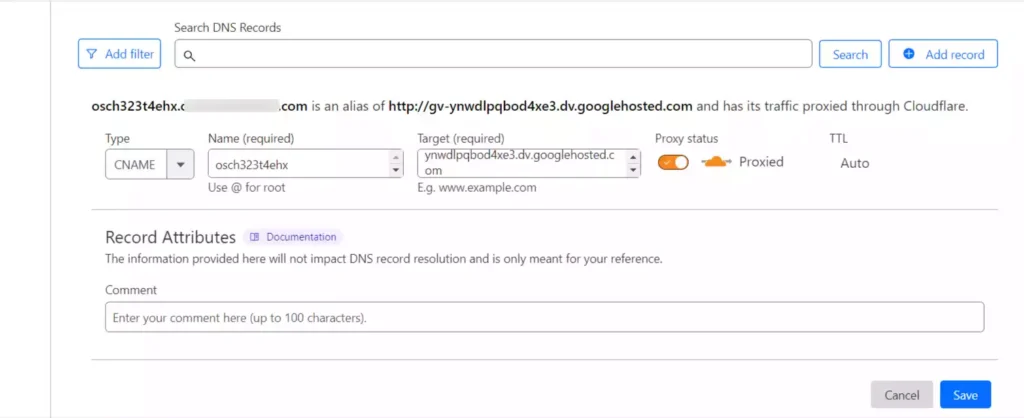
- Create a new CNAME record and add the second CNAME and its value underneath.
Remember, the second CNAME varies for each domain, so ensure accurate copying.
- Save both records and click ‘Save’ in Blogger.
DNS Propagation may take up to 24 hours.
- Enable HTTPS redirect in Blogger’s settings.
- If using Cloudflare, set up SSL Certificate.
Congratulations, You’re now connected to a custom domain in Blogger.
Conclusion
My suggestion, invest in a custom domain for serious blogging.
It’s easy to set up in Blogger.
Ask any questions in the comments.