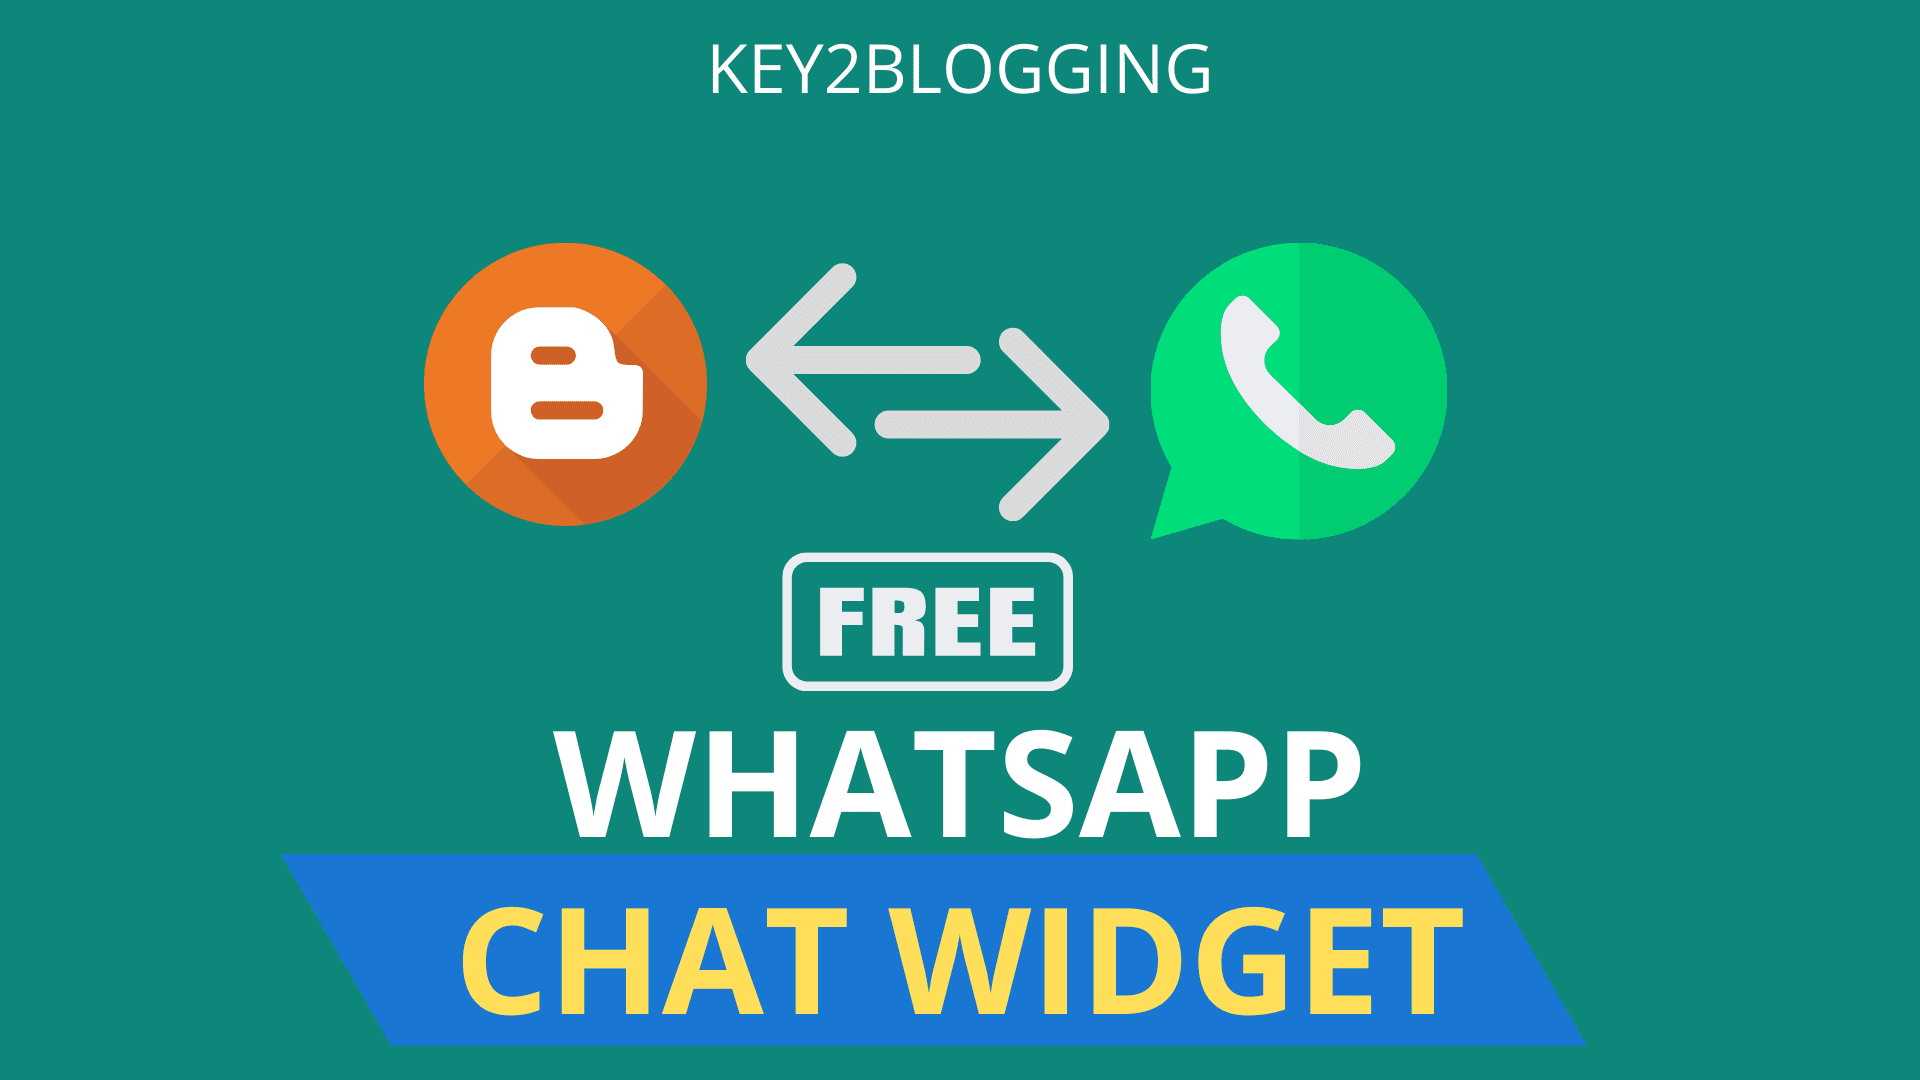
How to Add a WhatsApp Chat Button in Blogger (FREE)
WhatsApp is one of the widely used instant messaging platforms out there and you can take advantage of it in your business. You can easily sell your services and products through WhatsApp.
In this article, You will learn how you can add a WhatsApp chat button to your Blogger website.
So, before moving to the next step, let’s understand what are the benefits of adding a chat button to a website and whether should you use this on your website or not.
Well, according to recent data by eMarketer, WhatsApp has currently 390.1 million monthly active users in India followed by Brazil and the US.
So, you can take advantage of this instant messaging platform to grow your business. So, adding a WhatsApp chat widget gives your users an easy medium to contact you directly instead of sending Emails.
So, if you are a WordPress user then you can easily implement this on your website by adding a plugin. Follow the guide to Add WA chat button in WordPress.
Steps to Add WhatsApp chat button in Blogger
To Add the WhatsApp chat widget, follow the below steps.
Step 1: Log in to your Blogger dashboard and go to the theme section.
Step 2: Now take a theme backup and click on the Edit HTML option.
Step 3: Now search for the ]]></b:skin> tag or </style> tag and paste the CSS code just above it.
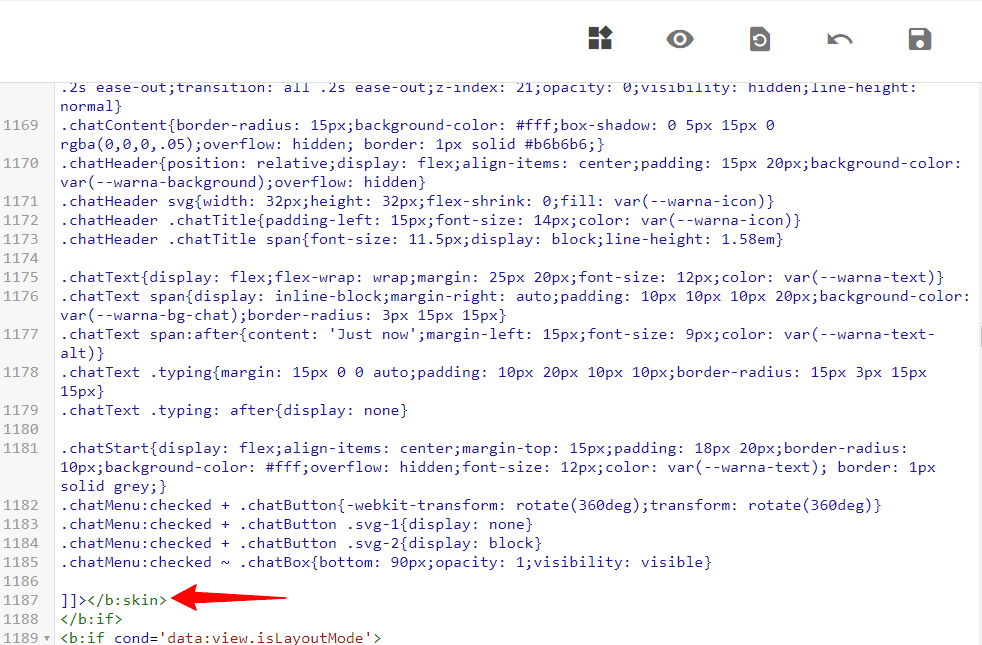
/* Chatbox Whatsapp */
:root {
--warna-background: #4dc247;
--warna-bg-chat: #f0f5fb;
--warna-icon: #fff;
--warna-text: #505050;
--warna-text-alt: #989b9f;
--lebar-chatbox: 320px;
}

svg{width: 22px;height: 22px;vertical-align: middle;fill: var(--warna-icon)}
.chatMenu, .chatButton .svg-2{display: none}

.chatButton{position: fixed;background-color: var(--warna-background);bottom: 20px;left: 20px;border-radius: 50px;z-index: 20;overflow: hidden;display: flex;align-items: center;justify-content: center;width: 50px;height: 50px;-webkit-transition: all .2s ease-out;transition: all .2s ease-out}
.chatButton svg{margin: auto;fill: var(--warna-icon)}

.chatBox{position: fixed;bottom: 70px;left: 20px;width: var(--lebar-chatbox);-webkit-transition: all .2s ease-out;transition: all .2s ease-out;z-index: 21;opacity: 0;visibility: hidden;line-height: normal}
.chatContent{border-radius: 15px;background-color: #fff;box-shadow: 0 5px 15px 0 rgba(0,0,0,.05);overflow: hidden; border: 1px solid #b6b6b6;}
.chatHeader{position: relative;display: flex;align-items: center;padding: 15px 20px;background-color: var(--warna-background);overflow: hidden}
.chatHeader svg{width: 32px;height: 32px;flex-shrink: 0;fill: var(--warna-icon)}
.chatHeader .chatTitle{padding-left: 15px;font-size: 14px;color: var(--warna-icon)}
.chatHeader .chatTitle span{font-size: 11.5px;display: block;line-height: 1.58em}

.chatText{display: flex;flex-wrap: wrap;margin: 25px 20px;font-size: 12px;color: var(--warna-text)}
.chatText span{display: inline-block;margin-right: auto;padding: 10px 10px 10px 20px;background-color: var(--warna-bg-chat);border-radius: 3px 15px 15px}
.chatText span:after{content: 'Just now';margin-left: 15px;font-size: 9px;color: var(--warna-text-alt)}
.chatText .typing{margin: 15px 0 0 auto;padding: 10px 20px 10px 10px;border-radius: 15px 3px 15px 15px}
.chatText .typing: after{display: none}

.chatStart{display: flex;align-items: center;margin-top: 15px;padding: 18px 20px;border-radius: 10px;background-color: #fff;overflow: hidden;font-size: 12px;color: var(--warna-text); border: 1px solid grey;}
.chatMenu:checked + .chatButton{-webkit-transform: rotate(360deg);transform: rotate(360deg)}
.chatMenu:checked + .chatButton .svg-1{display: none}
.chatMenu:checked + .chatButton .svg-2{display: block}
.chatMenu:checked ~ .chatBox{bottom: 90px;opacity: 1;visibility: visible}
Step-4: Now search for </body> tag and paste the HTML code just above it.
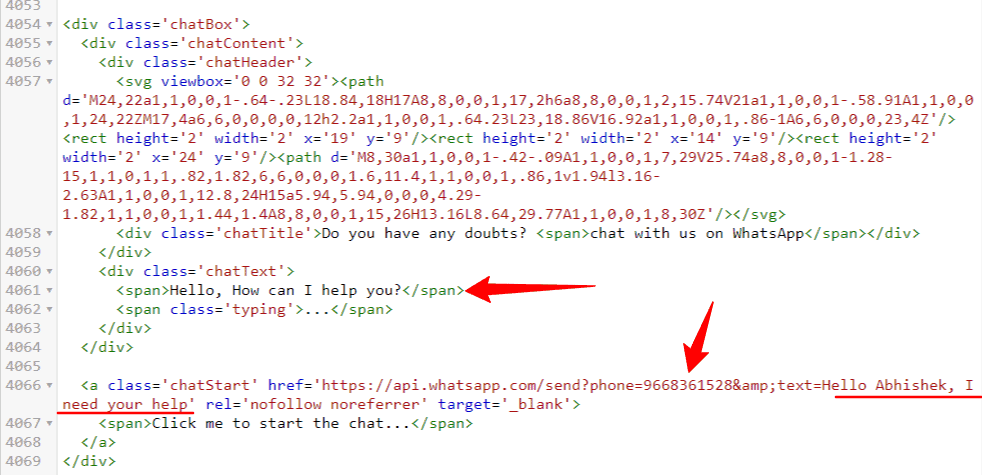
<input class='chatMenu hidden' id='offchatMenu' type='checkbox'/>
<label class='chatButton' for='offchatMenu'>
<svg class='svg-1' viewBox='0 0 32 32'><g><path d='M16,2A13,13,0,0,0,8,25.23V29a1,1,0,0,0,.51.87A1,1,0,0,0,9,30a1,1,0,0,0,.51-.14l3.65-2.19A12.64,12.64,0,0,0,16,28,13,13,0,0,0,16,2Zm0,24a11.13,11.13,0,0,1-2.76-.36,1,1,0,0,0-.76.11L10,27.23v-2.5a1,1,0,0,0-.42-.81A11,11,0,1,1,16,26Z'/><path d='M19.86,15.18a1.9,1.9,0,0,0-2.64,0l-.09.09-1.4-1.4.09-.09a1.86,1.86,0,0,0,0-2.64L14.23,9.55a1.9,1.9,0,0,0-2.64,0l-.8.79a3.56,3.56,0,0,0-.5,3.76,10.64,10.64,0,0,0,2.62,4A8.7,8.7,0,0,0,18.56,21a2.92,2.92,0,0,0,2.1-.79l.79-.8a1.86,1.86,0,0,0,0-2.64Zm-.62,3.61c-.57.58-2.78,0-4.92-2.11a8.88,8.88,0,0,1-2.13-3.21c-.26-.79-.25-1.44,0-1.71l.7-.7,1.4,1.4-.7.7a1,1,0,0,0,0,1.41l2.82,2.82a1,1,0,0,0,1.41,0l.7-.7,1.4,1.4Z'/></g></svg>
<svg class='svg-2' viewBox='0 0 512 512'><path d='M278.6 256l68.2-68.2c6.2-6.2 6.2-16.4 0-22.6-6.2-6.2-16.4-6.2-22.6 0L256 233.4l-68.2-68.2c-6.2-6.2-16.4-6.2-22.6 0-3.1 3.1-4.7 7.2-4.7 11.3 0 4.1 1.6 8.2 4.7 11.3l68.2 68.2-68.2 68.2c-3.1 3.1-4.7 7.2-4.7 11.3 0 4.1 1.6 8.2 4.7 11.3 6.2 6.2 16.4 6.2 22.6 0l68.2-68.2 68.2 68.2c6.2 6.2 16.4 6.2 22.6 0 6.2-6.2 6.2-16.4 0-22.6L278.6 256z'/></svg>
</label>
<div class='chatBox'>
<div class='chatContent'>
<div class='chatHeader'>
<svg viewbox='0 0 32 32'><path d='M24,22a1,1,0,0,1-.64-.23L18.84,18H17A8,8,0,0,1,17,2h6a8,8,0,0,1,2,15.74V21a1,1,0,0,1-.58.91A1,1,0,0,1,24,22ZM17,4a6,6,0,0,0,0,12h2.2a1,1,0,0,1,.64.23L23,18.86V16.92a1,1,0,0,1,.86-1A6,6,0,0,0,23,4Z'/><rect height='2' width='2' x='19' y='9'/><rect height='2' width='2' x='14' y='9'/><rect height='2' width='2' x='24' y='9'/><path d='M8,30a1,1,0,0,1-.42-.09A1,1,0,0,1,7,29V25.74a8,8,0,0,1-1.28-15,1,1,0,1,1,.82,1.82,6,6,0,0,0,1.6,11.4,1,1,0,0,1,.86,1v1.94l3.16-2.63A1,1,0,0,1,12.8,24H15a5.94,5.94,0,0,0,4.29-1.82,1,1,0,0,1,1.44,1.4A8,8,0,0,1,15,26H13.16L8.64,29.77A1,1,0,0,1,8,30Z'/></svg>
<div class='chatTitle'>Do you have any doubts? <span>chat with us on WhatsApp</span></div>
</div>
<div class='chatText'>
<span>Hello, How can I help you?</span>
<span class='typing'>...</span>
</div>
</div>
<a class='chatStart' href='https://api.whatsapp.com/send?phone=9668362528&text=Hello Abhishek, I need your help' rel='nofollow noreferrer' target='_blank'>
<span>Click me to start the chat...</span>
</a>
</div>Step-5: Now change the WhatsApp number and predefined messages and save the code.
Now the WhatsApp chat button will be added to your Blogger website.
Watch the below video to know the steps visually.

How to customize the WhatsApp chat widget?
Well, you can further customize the look and feel of the chat button like you can change the button color, adding a border and box-shadow in it.
Here the chat button is placed 20px from the left side and if you want to change it to the right you have to change the position in the CSS code.
Here, you have to change two values on is for the Chat button (.chatButton) and Chatbox (.chatBox). Here you have to change the code left:20px; to right:20px;.
You can also change the WhatsApp Icon by changing the SVG code in the HTML code provided above.
New WhatsApp Chat Button For Blogger & WordPress

<style>
.Simple_whatsapp_btn {
  position: fixed;
  bottom: 20px;
  left: 20px;
  background-color: #16BE45;
  color: white;
  border-radius: 40px;
  padding: 10px 20px;
  display: flex;
  align-items: center;
  font-family: system-ui;
  z-index: 999;
}

.Simple_whatsapp_btn a {
  text-decoration: none;
  color: inherit;
  display: flex;
  align-items: center;
}

.Simple_whatsapp_btn svg {
  fill: #FFF;
  margin-right: 5px;
  height: 25px;
  width: 25px;
}

.Simple_whatsapp_btn span {
  font-size: 16px;
  font-weight: bold;
}
</style>

 <a href='https://wa.me/+91xxxxxxxxx' target='_blank'>
<div class='Simple_whatsapp_btn'>

      <svg fill='none' height='25' viewBox='0 0 25 25' width='25' xmlns='http://www.w3.org/2000/svg'>
        <path d='M18.1225 14.9458C17.8183 14.7895 16.3033 14.0473 16.0215 13.9469C15.7397 13.8409 15.5332 13.7907 15.3295 14.1032C15.123 14.4129 14.5371 15.102 14.3529 15.3113C14.1744 15.5178 13.993 15.5429 13.6889 15.3894C11.8808 14.4854 10.695 13.7767 9.50361 11.7315C9.18832 11.1874 9.8189 11.2265 10.4076 10.0518C10.5081 9.84534 10.4578 9.66956 10.3797 9.51331C10.3016 9.35706 9.68776 7.84478 9.43106 7.22815C9.18274 6.62826 8.92604 6.71197 8.7391 6.70081C8.56053 6.68965 8.35684 6.68965 8.15037 6.68965C7.9439 6.68965 7.61187 6.76777 7.33006 7.0719C7.04825 7.38161 6.25305 8.12659 6.25305 9.63887C6.25305 11.1511 7.35517 12.616 7.50584 12.8225C7.66209 13.0289 9.67381 16.1316 12.7625 17.4681C14.7157 18.3107 15.4802 18.3833 16.4567 18.2382C17.051 18.1489 18.2759 17.496 18.5298 16.7734C18.7837 16.0535 18.7837 15.4369 18.7084 15.3085C18.6331 15.1718 18.4266 15.0937 18.1225 14.9458Z' fill='white'/>
        <path d='M24.0292 7.65625C23.3986 6.15792 22.4946 4.81306 21.3422 3.65792C20.198 2.50948 18.8395 1.5966 17.3439 0.970982C15.8093 0.326451 14.1798 0 12.5002 0H12.4444C10.7535 0.00837054 9.11567 0.343192 7.57549 1.00167C6.09267 1.63371 4.74699 2.54821 3.61344 3.6942C2.47226 4.84654 1.57661 6.18583 0.95719 7.67857C0.315449 9.22433 -0.00821224 10.8677 0.000158294 12.5586C0.00962607 14.4963 0.468048 16.4054 1.33944 18.1362V22.3772C1.33944 22.7176 1.47467 23.0441 1.71537 23.2848C1.95607 23.5255 2.28253 23.6607 2.62293 23.6607H6.86679C8.59752 24.5321 10.5067 24.9905 12.4444 25H12.5029C14.1743 25 15.7954 24.6763 17.3216 24.043C18.8097 23.4248 20.163 22.5226 21.306 21.3867C22.4583 20.2455 23.3651 18.9118 23.9985 17.4247C24.657 15.8845 24.9918 14.2467 25.0002 12.5558C25.0085 10.8566 24.6793 9.20759 24.0292 7.65625ZM19.8132 19.8772C17.8573 21.8136 15.2624 22.8795 12.5002 22.8795H12.4527C10.7702 22.8711 9.09893 22.4526 7.62293 21.6657L7.38855 21.5402H3.45998V17.6116L3.33442 17.3772C2.54759 15.9012 2.12906 14.2299 2.12069 12.5474C2.10953 9.76562 3.17259 7.15402 5.12293 5.18694C7.07047 3.21987 9.67371 2.1317 12.4555 2.12054H12.5029C13.898 2.12054 15.2513 2.39118 16.5264 2.9269C17.7708 3.44866 18.8869 4.19922 19.8467 5.15904C20.8037 6.11607 21.5571 7.23493 22.0788 8.47935C22.6201 9.76841 22.8908 11.1356 22.8852 12.5474C22.8685 15.3265 21.7775 17.9297 19.8132 19.8772Z' fill='white'/>
        </svg>
      <span>Click to Chat</span>

  </div>
  </a>
You can also use the WhatsApp link in this format as well.
https://api.whatsapp.com/send?phone=9678465528&text=Hello, I need your help
Conclusion
I hope this article helps you add the chat button to your blogger website. If you face any problem during this process then You can ask me in the comment section or Join our Telegram group for discussion.
For more Amazing tutorials like this, you can Subscribe to our YouTube channel Key2Blogging, and follow me on Twitter for updates.


Hello. Thanks for the tutorial on how to add floating Whatsapp button on blogspot.
I followed your description but the button flashes and disappears when loading the page. How can I fix it?
Need to check, You can email with the page url along with screenshot of the issue you are facing. so i can help you with that.
Thanx bro
how to change whatsapp logo ?
You can do that by changing the SVG code.
How to change svg code
How to ad massager chat
Very helpful site. Highly recommended.
It looks great in WordPress. Congratulations.
Thanks for this. Nice tutorial
am glad to come across this whatsapp tutorial. I have been longing for this… Thanks