How to Add a Mailchimp Signup form in Blogger?

In this article, I will show you how you can add an email signup form to your Blogger website.
Here, I will show you the step-by-step process to add the Mailchimp signup form in the sidebar of the Blogger website. This subscriber form will be designed using HTML, CSS & Javascript.
So, let’s start the article.
What is Email Marketing?
Email marketing is the process of sending email updates about products and services and build a solid relationship with the customer or the client.
You can use it to send updates about your blog or send a free ebook, invite users to join webinars, or send discount coupons and increase Affiliate sales.
As the Feedburner is shut down by Google, there is no inbuilt way to collect emails in the Blogger platform. That’s why You need an email marketing tool like Mailchimp which allows us to build an email list and send emails for free.
In Mailchimp, You can add up to 2000 subscribers for free and send 10,000 emails per month. And if you want to add more subscribers then you can upgrade to the premium plan.
The signup form that comes with Mailchimp is very basic and doesn’t look good. That’s why we need to redesign this form using CSS codes.
So, let’s check how you can collect emails of your visitors using the Mailchimp signup form in Blogger.
Steps to Add Mailchimp signup form in Blogger
Step-1: To add an email signup form in Blogger you need to follow the below steps.
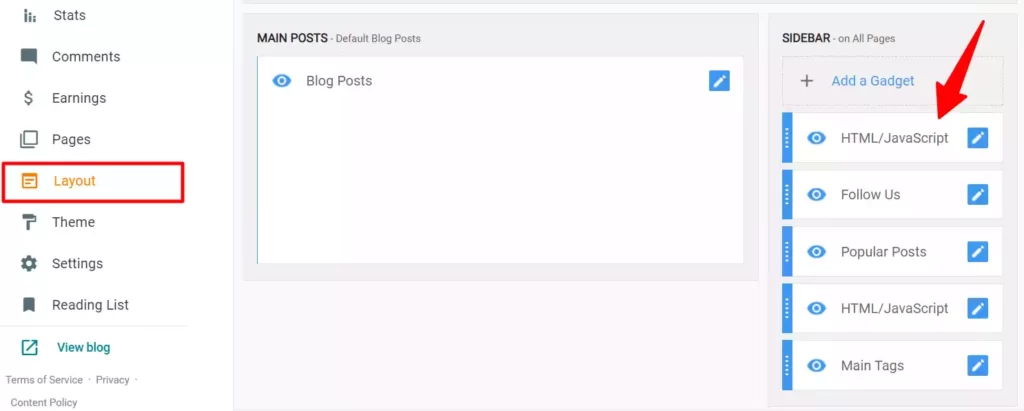
Step-2: Go to Blogger dashboard and click on the Layout section. Now add an HTML/Javascript widget in the sidebar.
Step-3: Now copy the below HTML code and paste it into the widget section.
<div class="container">
    <!-- Begin Mailchimp Signup Form -->
<div id="mc_embed_signup">
<form action="ADD-YOUR-MAILCHIMP-URL-HERE" method="post" id="mc-embedded-subscribe-form" name="mc-embedded-subscribe-form" class="validate" target="_blank" novalidate>
    <div id="mc_embed_signup_scroll">
<div class="mc-field-group">
	<label for="mce-EMAIL">Email Address  <span class="asterisk">*</span>
</label>
	<input type="email" value="" name="EMAIL" class="required email" id="mce-EMAIL" />
</div>
<div class="mc-field-group">
	<label for="mce-NAME">Name  <span class="asterisk">*</span>
</label>
	<input type="text" value="" name="NAME" class="required" id="mce-NAME" />
</div>
	<div id="mce-responses" class="clear">
		<div class="response" id="mce-error-response" style="display:none"></div>
		<div class="response" id="mce-success-response" style="display:none"></div>
	</div>    <!-- real people should not fill this in and expect good things - do not remove this or risk form bot signups-->
    <div style="position: absolute; left: -5000px;" aria-hidden="true"><input type="text" name="b_ac52e8b1ce2a06907e0091d7c_63bf572981" tabindex="-1" value="" /></div>
    <div class="indicates-required"><span class="asterisk">*</span> indicates required</div>
    <div class="clear"><input type="submit" value="Subscribe" name="subscribe" id="mc-embedded-subscribe" class="subscribe" /></div>
    </div>
</form>
</div>
<script type='text/javascript' src='//s3.amazonaws.com/downloads.mailchimp.com/js/mc-validate.js'></script><script type='text/javascript'>(function($) {window.fnames = new Array(); window.ftypes = new Array();fnames[0]='EMAIL';ftypes[0]='email';fnames[1]='NAME';ftypes[1]='text';}(jQuery));var $mcj = jQuery.noConflict(true);</script>
<!--End mc_embed_signup-->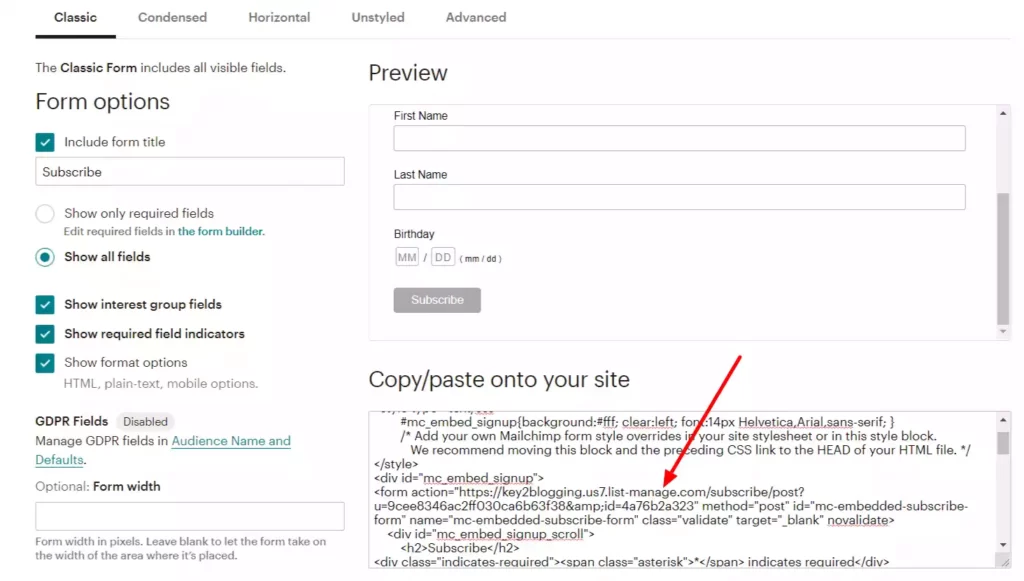
</div>Step-4: Now Login to your Mailchimp dashboard and copy and replace the MailChimp URL in the above code.
Step-5: Now Go to the blogger theme editor and paste the below CSS code just above the ]]></b:skin> tag or </style> tag.
form {
        background: #004369;
        border-radius: 30px;
        padding: 50px 20px 50px 20px;
        margin: 10px 0 10px;
        font-size: 22px;
        position: relative;
        box-shadow: 0 40px 50px -50px #89fcf3;
    }

    form input {
        display: block;
        width: 100%;
        border-radius: 12px;
        border: none;
        height: 50px;
        padding: 15px;
        background: FFFFFF;
        color: black;
        transition: 0.5s;
    }

    form input:focus {
        outline: none;
        box-shadow: 0px 10px 30px -20px #89fcf3;
        filter: contrast(85%)
    }

    form label {
        color: #CCCDCF;
        font-weight: bold;
        display: inline-block;
        margin-bottom: 15px;
        font-size: 22px;
    }

    form .subscribe {
        max-width: 300px;
        height: auto;
        background: #DB1F48;
        border: #E5DDC8 2px solid;
        border-radius: 45px;
        font-weight: bold;
        line-height: normal;
        margin: 0 auto -80px;
    }

    form .subscribe:hover {
        background: #01949A;
        color: #151515;
        cursor: pointer;

    }

    /* Mailchimp CSS */
    form .mc-field-group {
        margin-bottom: 20px;
    }

    form .indicates-required {
        color: #CCCDCF;
        font-size: 0.5em;
        margin: 35px 0;
        text-align: center;
    }

    form input + .mce_inline_error {
        display: inline-block;
        font-size: 0.5em;
        position: relative;
    }

    form input + .mce_inline_error:before {
        content: '';
        width: 0;
        height: 0;
        border-left: 10px solid transparent;
        border-right: 10px solid transparent;
        border-bottom: 10px solid #6B0505;
        position: absolute;
        top: -10px;
}Step-6: Now save the code and the Mailchimp email signup form is added to your blogger website.
If you face any problem during this process, you can take the help of the below video guide.

Note: If you can add the signup form in both sidebar and the footer area, whichever is suitable for you.
You can further customize this email subscriber for in Blogger by modifying the CSS code. In the above video, I have explained how you can do that.
Read Also: Best Autoresponders for Affiliate marketing
I hope after following this tutorial, you have successfully added the Mailchimp signup form to your Blogger website. If you still have any doubts, feel free to ask me in the comment section.
You can further set automation in Mailchimp, so whenever a new user subscriber joins your email list, a welcome message will send automatically to their email address. You can also automate emails that will send automatically after certain intervals like days or weeks.
If you want me to make a tutorial on this, do let me know in the comment section.
For more such interesting updates, do join our Weekly newsletter below. Thank you.

Be the First to Get the Update
Join our weekly Newsletter to get the latest SEO News, marketing trends, exclusive Blogging tips, and tricks, right into your mailbox.


Hi! I tried this but my widget is wider than the column width so it looks out of place. Is there anyway to make the mailchimp widget smaller?
Thanks!
For this, I need to check the website layout properly. You need to adjust the CSS value, especially the width, margin, and padding value.
So glad I stumbled on this webpage, it’s really of great help.. thanks for sharing