How To Buy Cheap Web Hosting With A Free Domain Name
To build a website in WordPress you need two main things that are a domain name and a hosting service. In the Last post we have discussed what is a Domain and hosting and today we will see how you can buy cheap web hosting with a free domain name for your website.
If you want to start your blog in Blogger then you need a Domain name only and you don’t need to buy a hosting service for it. Google Blogger provides free hosting services in its blogging platform.
If you don’t know how to start a blog in blogger then you can check this post for step by step guide where I explain how to set up a website in Blogger and publish your post for free.
Ok, If you decided to start your website in WordPress, then read this post on how to buy your domain and hosting at a very cheap price and save your money for future investment in your website.
Things to remember before buying a domain and hosting:
If you are a beginner and don’t know much about hosting and domain purchase then make sure to check these points before buying your domain and hosting from a company.
If you don’t know how to choose a domain name then you can read it in our previous article. You will get a brief idea about what domain name and how to choose the best domain for your website.
- Make sure to research about the domain which you are going to buy.
- Always buy a top level domain like .com (recommended), .net, .tech or country specific domain like .IN, .UK, .US etc
- Buy your domain and hosting from a trusted platform and compare pricing with different platforms.
- Make sure to keep eye on renew prices and don’t attract by offers as companies increase theirs renew prices by applying some offers.
- Buy web hosting according to your need and don’t waste money on higher plans like VPS or cloud hosting if you are a beginner.
- Start with shared hosting plans and you can upgrade to other hosting plans in the future according to your need.
Buy a Free Domain name with Hostinger hosting:
Just Go to the Hostinger website and select your country on the top left-hand side. In this guide, we will select India, and then You will see three shared hosting plans.
- Single Web Hosting
- Premium Web Hosting
- Business Web Hosting
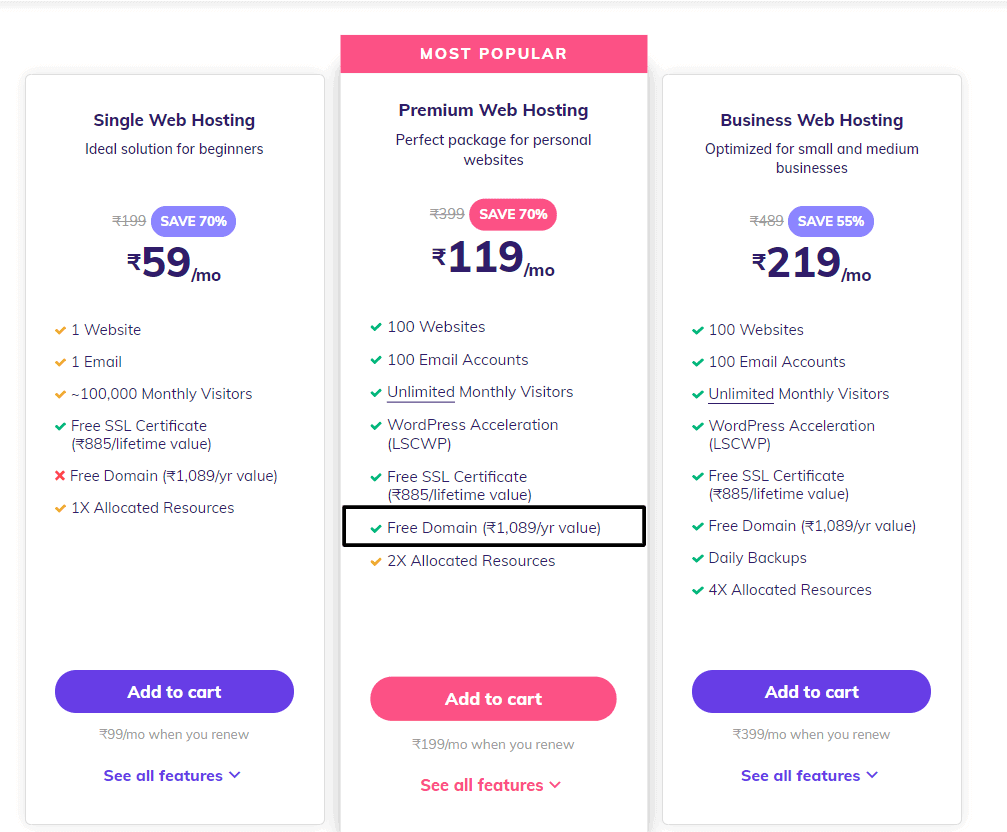
Note that the Free domain is available in the premium and business hosting plans only. There is no free Domain in Single web Hosting.
Single web Hosting vs Premium Web Hosting
| Single Web Hosting | Premium Web Hosting |
|---|---|
| 1 Website | 100 Websites |
| 1 Email | 100 Email Accounts |
| ~100,000 Monthly Visitors | Unlimited Monthly Visitors |
| 1X Allocated Resources | 2X Allocated Resources |
| Free SSL Certificate (₹885/lifetime value) | Free SSL Certificate (₹885/lifetime value) |
| —- | Free Domain (₹1,089/yr value) |
Hostinger really provides very cheap web hosting with better performance and website speed. Premium Hosting plan is really a value for money for you as it provides 100 website support, Free domain name, and Unlimited bandwidth. If you want to host only one website and you have already purchased your domain name then you can go for single web hosting.
There is two way you can buy a domain name.
- You can first purchase your domain name from GoDaddy or Namecheap and then link it to your hosting provider via Nameserver integration.
- In the second method, you can buy a shared hosting and get a free domain name for 1 year. Hostinger, Bluehost, etc provide free domain names along with their hosting plan.
In this guide, I will show you how to buy cheap and reliable web hosting along with a free domain name from hostinger.
☑ Read the complete Hostinger Hosting Review: features, pricing, performance, customer support, etc.
Steps to buy cheap web hosting with a free domain name :
1. Go to Hostinger website and select your shared hosting plan
Go to the Hostinger homepage and select your country in the top left corner.
After Selecting the premium hosting plan your product is added to a cart and you will see a screen like this as shown in the below screenshot.

Here you have to select the number of months like 12 months, 24 months, and 36 months. You will get a higher discount by selecting the higher month plan. I recommend you to go for at least 24 months plan.
Here you will find a free SSL certificate and a 30 days money-back guarantee. This means if you are not satisfied with the Hostinger quality you can claim a refund within 30 days.
At the bottom of this screen, you will ask to search for a domain name. You can leave it for now and after purchasing the plan you can claim your domain easily.
Make sure to check the renewal price as it fluctuates and after adding any promo code it may increase. After all, set click on check out Now button.
2. Create an Hostinger account
After selecting the time period you will be asked to create an Hostinger account. You can create an account by social sign-in options like Gmail, Facebook or you can create an account by manually typing your name, address, and email address.
Make sure to type your Email address correctly as it is used to get login details of your domain and hosting.
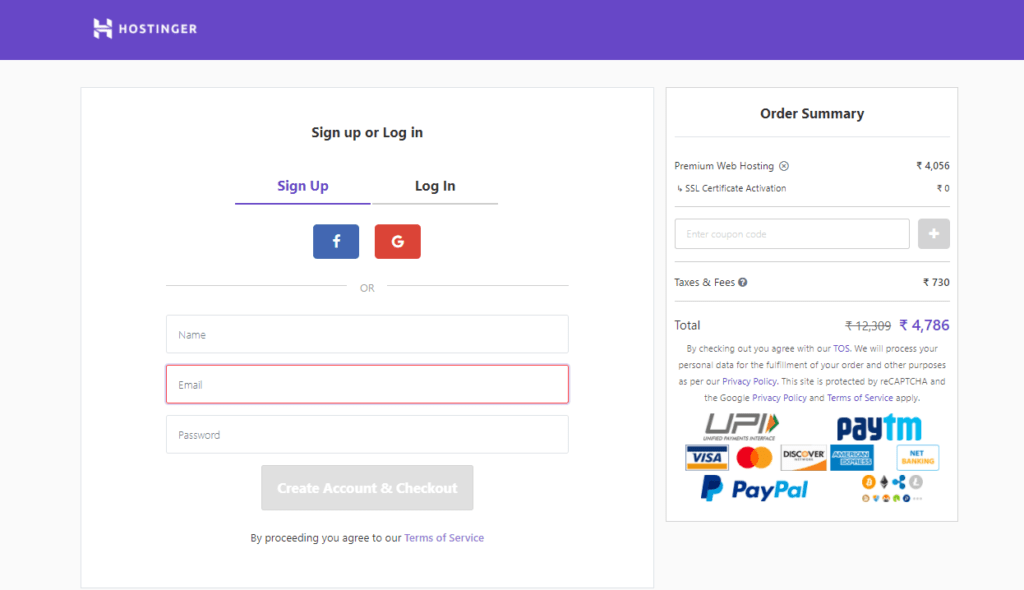
Create a strong password here using character, symbol, and number combination and save it for future use.
3. Choose payment method
After creating an account you will be redirected to a new payment page where you have complete flexibility to choose a payment method as your choice.
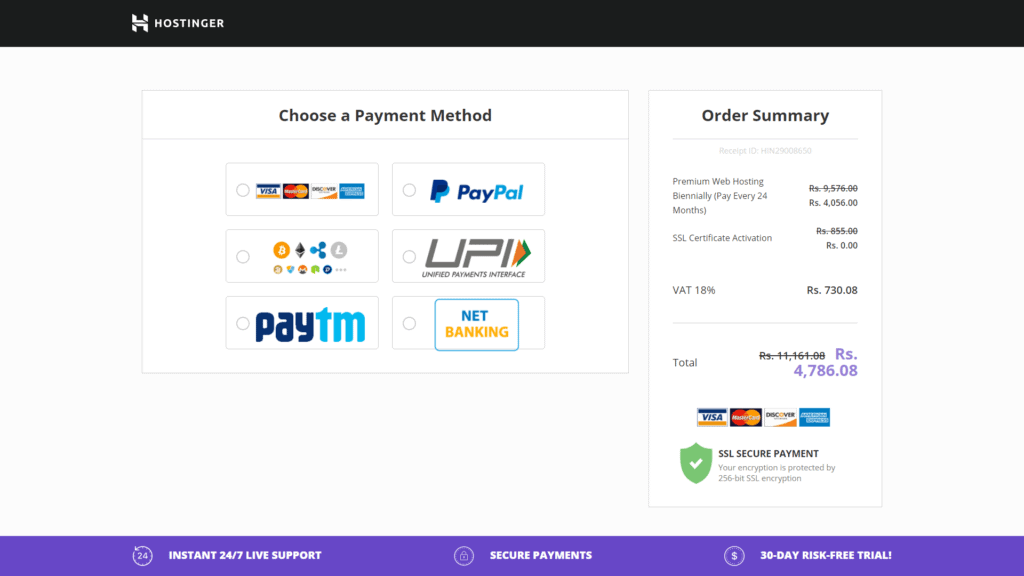
You can pay through debit card, UPI, Net banking, PayPal, etc. Hostinger also supports the bitcoin payment method.
Here you will see the final amount including tax. In India, you have to pay 18% tax on the total amount.
3. Get login details of your Hostinger H-panel
After payment is successfully completed you will get an email to log in to your Hostinger dashboard.
You need to know that Hostinger provides an H-panel instead of a c-panel. If You are facing a problem with WordPress installation then you can contact us, we will help you set up your website for free. But, You need to purchase the hosting from our affiliate link, so that we will get small commissions at no extra cost to you.
In the next tutorial, we will discuss the Hostinger H-panel and how to install and manage WordPress. If You want us to make a more detailed guide on other cheap web hosting services then let me know in the comment section.
If you like this tutorial then share it with your friends on social media and tag us.