How to Create SubDomain & Install wordpress with SSL In Hostinger

This article will show you how to create a subdomain in Hostinger. But, before that, you need to understand what a subdomain is and how it differs from Subfolder. What is the SEO impact on the subdomain?
Well, read the Article till the end to know all details.
A subdomain is an additional part of your main domain which is added to the beginning of a website’s domain name.
Suppose Consider Our website domain name which is key2blogging.com
Here, the URL will be https://key2blogging.com
If I want to create a subdomain like Shop.key2blogging.com then in that case the URL will be https://shop.key2blogging.com
So, I can install a new Wordpress website on this subdomain and keep the database separate from my main domain.
But, Subfolder is added within the same domain like https://key2blogging.com/shop. Here, You don’t need to create a separate Wordpress account for this page as it exists under the same Main Domain name.
So, Google considers Subdomain as a separate website and doesn’t pass all website authority earned by the main domain to the subdomain. You need to work on the subdomain as a completely new website.
If you want to keep the link juice then, in that case, the subfolder is a Good choice for you. But, for those who want to extend the functionality and install a separate Wordpress site then a subdomain is helpful for them.
If you are using Hostinger then you can easily create subdomains and install Wordpress on them easily. But, in the basic shared hosting plan you can create a maximum of 2 subdomains whereas in premium shared hosting you can create up to 100 subdomains in a single main domain.
If you have purchased a domain outside of Hostinger then you can connect your domain to hostinger either by changing the Nameserver or by using the A record. In the case of A record, you need to add a new A record for your subdomain which I will show you later in this article.
How to create a subdomain in Hostinger?
To create a subdomain, login to your hostinger H-panel and click on the hosting section.
Now Click on the Manage tab on the right-hand side of your hosting to enter the H-panel Dashboard.
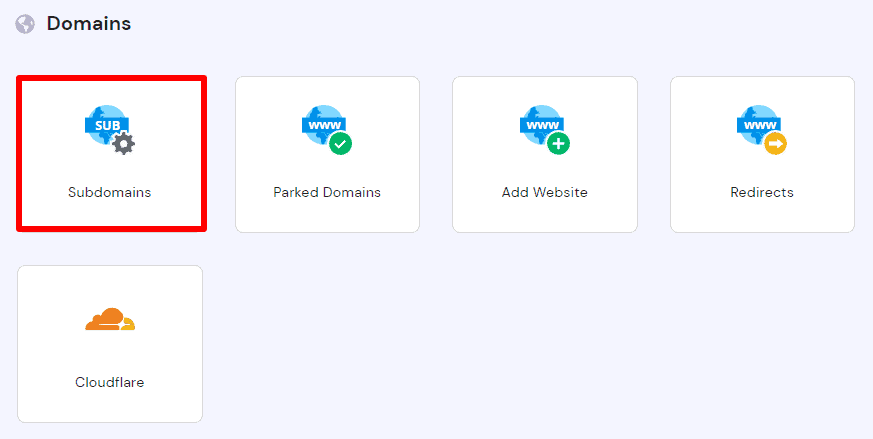
Here, scroll down and you will see the ‘Subdomain‘ option under the ‘Domains‘ section.
Now you will see a screen like this as shown in the below image. Here, add the extension name of your subdomain.
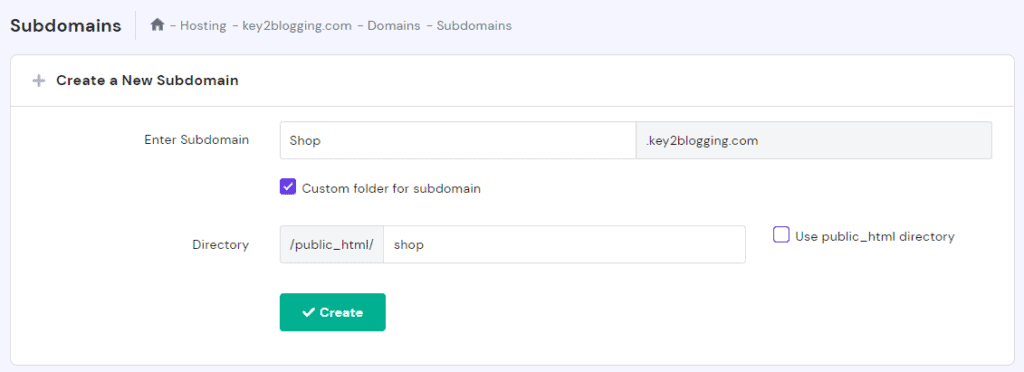
Here, click on the check box “custom Folder for Subdomain” and add a name to the folder where all of your files will save.
After, clicking the create button, the subdomain is successfully created on the hostinger hosting.
How to Add A record for the subdomain in DNS using Cloudflare?
If you are using the A record to connect your domain to the hostinger then in that case you need to add a new A record for your subdomain.
Just login to your Cloudflare dashboard and under the DNS tab click on Add New Record.
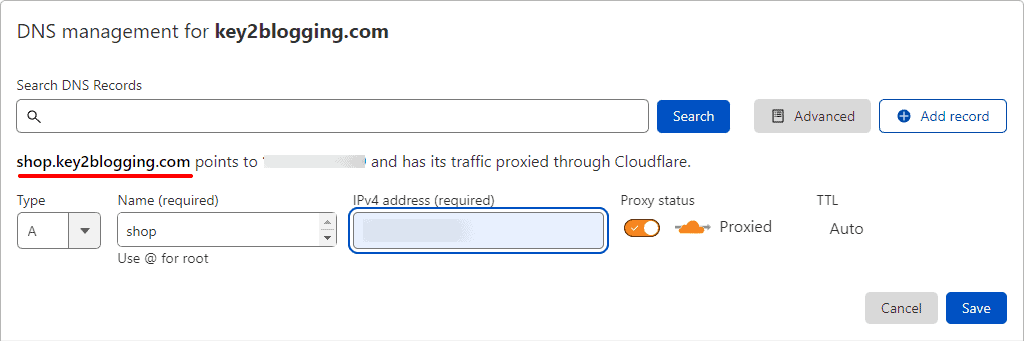
Here, in the Type choose the A and in the name field you need to add the name of your subdomain and in the Ip Address, you need to add your website IP address.
After that, your Subdomain will be connected to Cloudflare.
How to install Wordpress on a Subdomain in Hostinger?
Now you have created the subdomain, it’s time to install the Wordpress CMS on that. So, for this click on the “website” tab and then click on the “Auto Installer” option.

Now select the CMS platform, in this case, select the Wordpress Option.
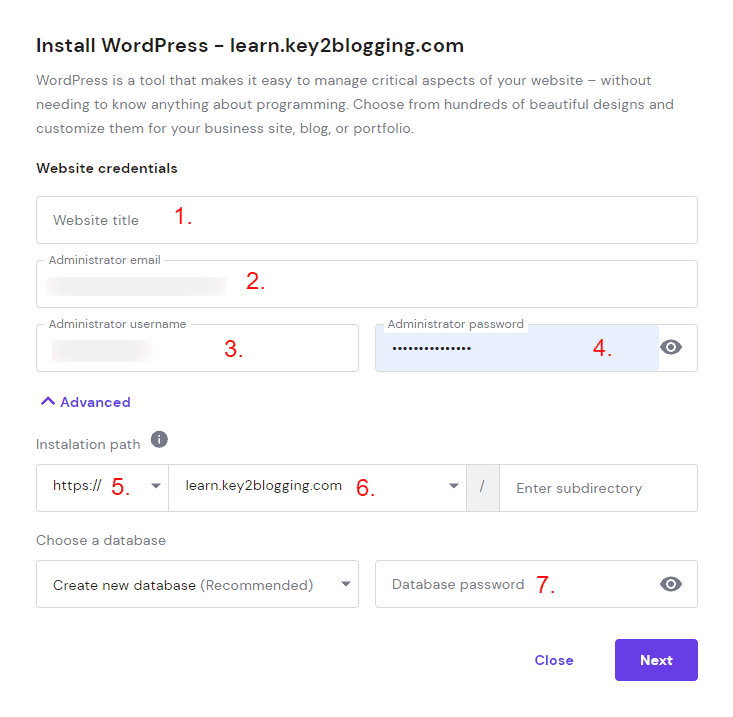
Now you will see a popup Like this where you need to add the website title (1), Administrator Email address (2), Username (3), and Password (4).
Now, click on the Advanced tab and you need to switch to the HTTPS (5) option and select the subdomain (6) and Add the Database Password (7). Now click on the next button and Wordpress will be installed on your subdomain.
How to Activate SSL in Subdomain?
After creating the Subdomain in hostinger, the SSL certificate will be installed automatically. But, in some cases, the installation failed. So, we can create a Free SSL certificate in Cloudflare and import that SSL to our subdomain in Hostinger.
For this login to your Cloudflare dashboard and select the domain where you want to get an SSL certificate.
Now click on the SSL/TLS tag and go to the origin server option. Now click on the “Create Certificate Option”.
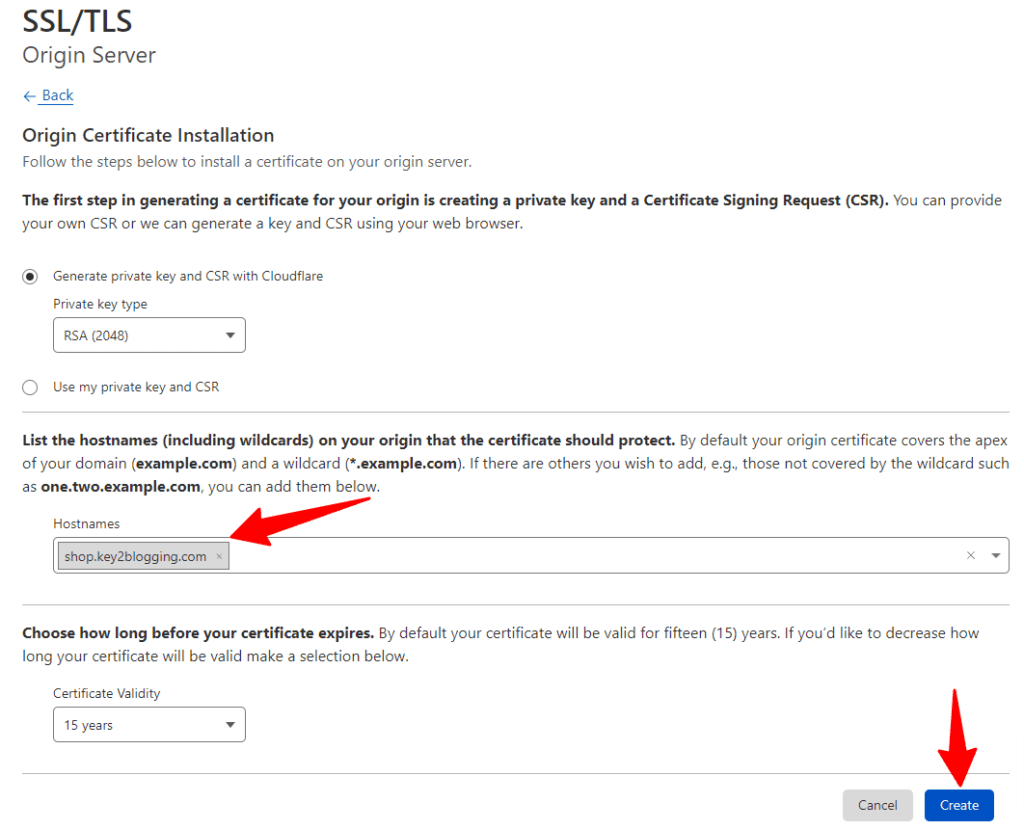
Now you need to Remove all previous host name and type the subdomain and select it. Now click on the Create button to create the Origin certificate and private key.
Now you need to import that SSL certificate to your hostinger Subdomain. Click on the Import SSL Tab and paste the SSL keys here.
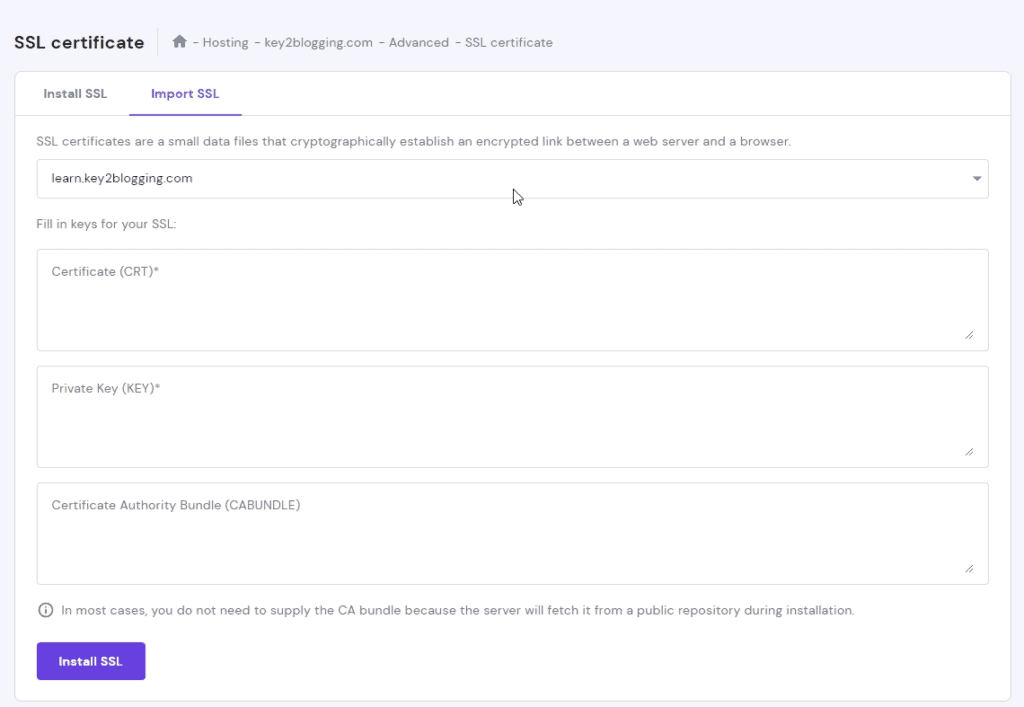
Now click on the Install SSL button and SSL will be installed in your subdomain in Hostinger.
Now you can log in to your Wordpress admin panel by adding /wp-admin after the root URL.
Conclusion
I hope this Tutorial will help you understand the basic concept of a Subdomain, How to create a subdomain in Hostinger, How to install Wordpress on it, and how to get SSL for your subdomain.
If you have any doubts regarding this then you can ask me in the comment section. You can also Hire me to do this technical stuff for you. Check out our Service page for more info.
Read Also: Detailed Hostinger Hosting Review: speed, reliability, pricing, and plans