How to Password Protect a Page in Blogger Website
In this Article, You’ll learn How you can protect your Blogger pages with a password and only allow limited people to access your Premium Content.
This is quite easy to implement in Blogger website, Just follow the steps as shown below.
Steps to Password Protect a Blogger Page
Login to your Blogger dashboard and Open the page where you want to implement the password.
Now paste the Below code in the EDIT HTML Section and You need to replace the password for the page in the code highlighted below.
<style>
  .password-container {
    max-width: 900px;
    margin: 50px auto;
    padding: 20px;
    border: 1px solid #ccc;
    border-radius: 10px;
    display: none;
  }
  .password-input {
    width: 95%;
    padding: 10px;
    margin: 10px 0;
    border: 1px solid #ccc;
    border-radius: 5px;
  }
  .password-button {
    width: 100%;
    padding: 10px;
    background-color: #4CAF50;
    color: white;
    border: none;
    border-radius: 5px;
    cursor: pointer;
  }
  .password-button:hover {
    background-color: #45a049;
  }
  #protected-content {
    display: none;
    padding: 20px;
    border: 1px solid #ccc;
    border-radius: 10px;
    margin-top: 20px;
  }
</style>

<script type="text/javascript">
  function setCookie(name, value, days) {
    var expires = "";
    if (days) {
      var date = new Date();
      date.setTime(date.getTime() + (days * 24 * 60 * 60 * 1000));
      expires = "; expires=" + date.toUTCString();
    }
    document.cookie = name + "=" + (value || "") + expires + "; path=/";
  }

  function getCookie(name) {
    var nameEQ = name + "=";
    var ca = document.cookie.split(';');
    for (var i = 0; i < ca.length; i++) {
      var c = ca[i];
      while (c.charAt(0) == ' ') c = c.substring(1, c.length);
      if (c.indexOf(nameEQ) == 0) return c.substring(nameEQ.length, c.length);
    }
    return null;
  }

  function checkPassword() {
    var password = document.getElementById("password").value;
    if (password === "A123@#") {
      setCookie("passwordProtected", "true", 30); // Change 30 to the desired number of days
      document.getElementById("protected-content").style.display = "block";
      document.getElementById("password-form").style.display = "none";
    } else {
      alert("Incorrect password. Please try again.");
    }
  }

  function checkCookie() {
    var isProtected = getCookie("passwordProtected");
    if (isProtected) {
      document.getElementById("protected-content").style.display = "block";
    } else {
      document.getElementById("password-form").style.display = "block";
    }
  }

  window.onload = function() {
    checkCookie();
  }
</script>

<div class="password-container" id="password-form">
  <h2>Protected Page</h2>
  <input class="password-input" id="password" type="password" />
  <button class="password-button" onclick="checkPassword()">Submit</button>
</div>

<div id="protected-content">
  <!--Your protected content goes here-->

</div>
After that you need to paste the page content in the last Div tag just below this line <!–Your protected content goes here–>
That’s it, Now the content within that div can only be shown to visitors once they enter the right password you have set in this script.
Note that once the user enter the password and the password is right then he don’t have to enter password each time the user open the same page. It will save a cookies in the browser and bypass the user to enter the password again and again.
You can set the number of days for the cookies to store in the above script. ( Hint – Check below the password section).

Benefit of Adding Password to a page
- Allows you to control who can access the page, useful for members-only content, paid subscriptions, or internal documents.
- Protects sensitive information from unauthorized access
- Ensures that important announcements, updates, or event details are only accessible to the intended audience.
For Advanced users
If you don’t want to reveal the password within the Javascript used above then there is a way you can hide the password from normal users. So, user can’t see the actual password by inspecting the code using the dev tool.
So, for this you need to tweek the Javascript code a little bit as below.
<script>
    function setCookie(name, value, days) {
      var expires = "";
      if (days) {
        var date = new Date();
        date.setTime(date.getTime() + (days * 24 * 60 * 60 * 1000));
        expires = "; expires=" + date.toUTCString();
      }
      document.cookie = name + "=" + (value || "") + expires + "; path=/";
    }

    function getCookie(name) {
      var nameEQ = name + "=";
      var ca = document.cookie.split(';');
      for (var i = 0; i < ca.length; i++) {
        var c = ca[i];
        while (c.charAt(0) == ' ') c = c.substring(1, c.length);
        if (c.indexOf(nameEQ) == 0) return c.substring(nameEQ.length, c.length);
      }
      return null;
    }

    function checkPassword() {
      var password = document.getElementById("password").value;
      var encodedPassword = btoa(password);
      var correctEncodedPassword = "SGFwcHlAMTIz";

      if (encodedPassword === correctEncodedPassword) {
        setCookie("passwordProtected", "true", 30);
        document.getElementById("protected-content").style.display = "block";
        document.getElementById("password-form").style.display = "none";
      } else {
        alert("Incorrect password. Please try again.");
      }
    }

    function checkCookie() {
      var isProtected = getCookie("passwordProtected");
      if (isProtected) {
        document.getElementById("protected-content").style.display = "block";
      } else {
        document.getElementById("password-form").style.display = "block";
      }
    }

    window.onload = function() {
      checkCookie();
    }
  </script>
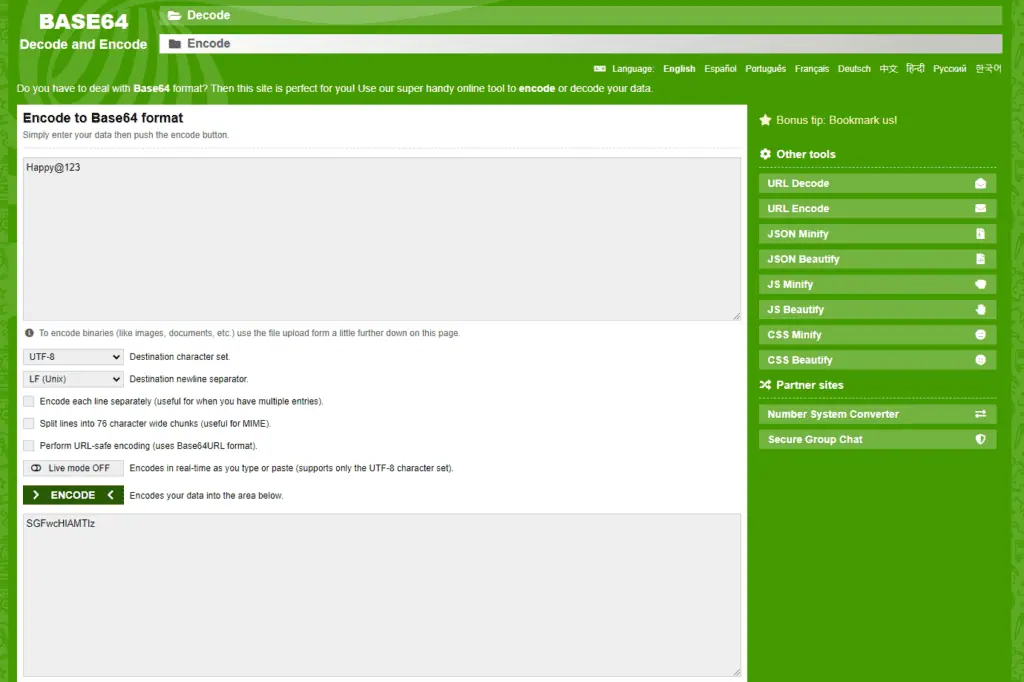
Here, instead of directly using the Password directly in the Script, You need to first Encode the password in a base 64 format as shown below. You can use this Free Base64 Encoder.
I hope you have learned how to protect Blogger pages with Password. If you have any doubt, feel free to ask in the comment section below.
If you Like this type of Tutorial, then don’t forget to Subscribe our YouTube Channel. Thank you.


Hi, I would like to have multiple different pages protected by a password – a different password for each page. However, when I use this code on all of those pages, the cookies unfortunately cooperate between the pages. Would it be possible to tweak the code somehow so that there are no cookies that would remember the password being put in? Or tweak the code so that the cookies renew after each refresh of the page?
I tried this on a blogger post, but when I entered the password, the pictures that were in the post did not show up and I got a 403 error.
May be the image URL has issue, You can try reuploading the image or use a different image Source URL.