Litespeed cache: the free alternative for the WP-Rocket plugin

Litespeed is a free WordPress cache plugin that you can use on your WordPress website with all the premium features.
But the most asked question on the web regarding this: Is the Litespeed cache plugin is better than WP-Rocket?
So, in this guide, I will share you with the complete comparison of Litespeed cache vs wp rocket.
I will also share the best settings in the Litespeed WordPress plugin to better optimize your website speed performance.
So, before moving to the comparison & best settings configurations, let’s understand some basics of caching and the advantages of using it on your WordPress website.
What is Cache & How does it work?
A cache is a high-speed data storage layer that store the frequently used data subset in a temporary file in the browser, so that future request of that data can be served faster.
Let’s understand with an example. If you log in to a new website, it takes longer to load the page as all the data are downloaded directly from the server to your browser.
So, to minimize that time browser saves some temporary files called cache in your device. when you again log in to the website, the browser doesn’t request all the files to the server and loads some regular files from its cache memory, and requests for dynamic contents only.
By Implementing the cache on your WordPress website you can drastically improve the speed for repeated customer and saves a lot of server bandwidth.
As you know Page speed is very crucial for ranking on competitive keywords. That’s why I prepared a detailed guide on how to improve core web vitals scores and give a better user experience.
What is LiteSpeed cache?
Litespeed Cache (LSCache) is a high-performance dynamic content acceleration feature of LiteSpeed server products. Most of the popular web hosting providers run on Litespeed servers like Hostinger, A2 Hosting, etc.
Litespeed vs WP-Rocket
As you know WP-rocket is an amazing cache plugin for WordPress with almost all premium features. But there is no free version of this plugin. It cost around $45 for 1 website & $99 for 3 websites with a time duration of 1 year.
But, most new bloggers don’t afford the price for a single plugin in WordPress. That’s why I will compare the LiteSpeed plugin with WP Rocket.
1. Caching
| Features | WP-Rocket | LiteSpeed |
|---|---|---|
| Static Full-Page Cache | ✔ | ✔ |
| Browser Cache Support | ✔ | ✔ |
| Private Cache | ✖ | ✔ |
| Cache Separate Mobile View | ✔ | ✔ |
| Mobile / AMP Cache | ✔ | ✔ |
| Tight Integration With Server | ✖ | ✔ |
| Cache Logged-in Users | ✔ | ✔ |
| Tag-Based “Smart Purge” | ✖ | ✔ |
| Exclude Selected URI’s from Optimization | ✖ | ✔ |
2. WordPress Optimization
| Features | WP-Rocket | LiteSpeed |
|---|---|---|
| HTML Minify | ✔ | ✔ |
| Database Optimization | ✔ | ✔ |
| Remove Query Strings | ✔ | ✔ |
| Remove Google Fonts | ✔ | ✔ |
3. CSS
| Features | WP-Rocket | LiteSpeed |
| CSS Minify / Combine | ✔ | ✔ |
| CSS HTTP/2 Push | ✔ | ✔ |
| Load CSS Asynchronously | ✔ | ✔ |
| Critical CSS (CCSS) Generation | ✖ | ✔ |
4. JS optimization
| Features | WP-Rocket | LiteSpeed |
| JavaScript Minify | ✔ | ✔ |
| JavaScript Combine | ✔ | ✔ |
| JavaScript HTTP/2 Push | ✖ | ✔ |
| Load JavaScript Deferred | ✔ | ✔ |
5. Image Optimization
| Features | WP Rocket | LiteSpeed |
|---|---|---|
| Image Optimization | ✖ | ✔ |
| WebP Support | ✖ | ✔ |
| Lazy Load Images | ✔ | ✔ |
| Lazy Load iframes (videos) | ✔ | ✔ |
| LQIP Placeholder | ✖ | ✔ |
6. Others
| Features | WP Rocket | LiteSpeed |
|---|---|---|
| CDN | PAID | FREE |
| Plugin Cost | PAID | FREE |
| Support Cost | PAID | FREE/PAID |
| Image Optimization Cost | PAID | FREE |
Now You knew the detailed feature comparison between WP-Rocket and LiteSpeed cache plugin in WordPress. It is interesting to know that despite LiteSpeed is a free plugin it provides almost all premium features.
It also supports Image optimization in two formats Lossy and Lossless. You can also Lazyload both images and videos for free. You can also take the advantage of webp format.
How do I install the LiteSpeed cache?

Step-1: Open the Plugin section of the WordPress dashboard and click on Add new button.
Step-2: Now search “LiteSpeed cache” in the search bar.
Step-3: Click on the install button & then activate the plugin.
Now you have successfully installed the Litespeed cache plugin to your WordPress website.
How to configure the Litespeed cache plugin?
1. General Setting:
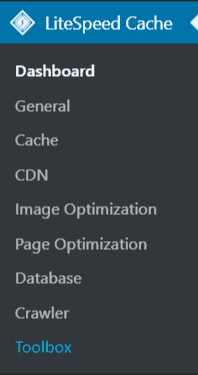
To set up the Litespeed cache, click on the Litespeed menu in the sidebar of the WordPress dashboard.
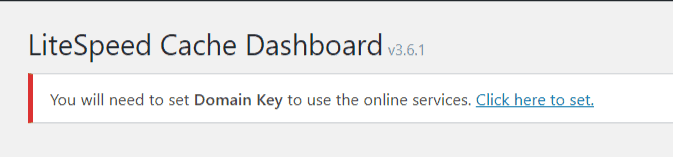
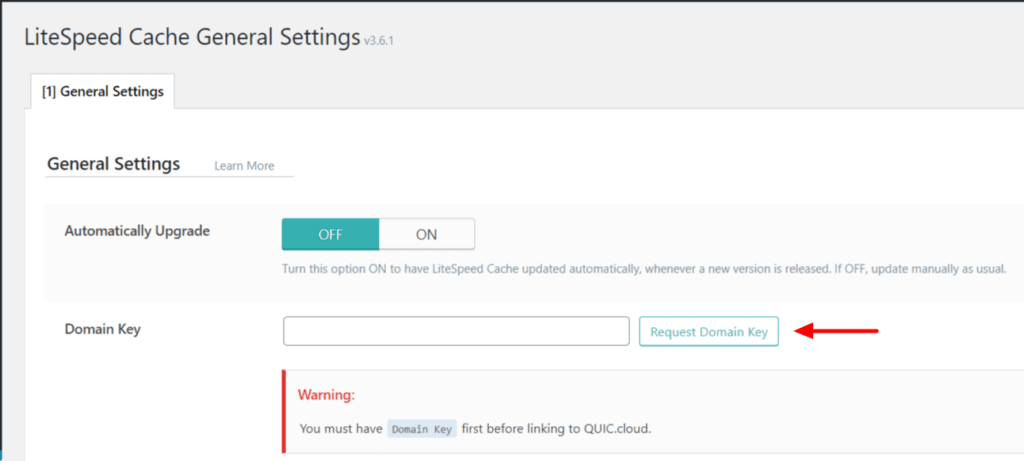
Now click on the Litespeed dashboard. You will see a notice on the top to set your domain key. Now click on that.
Then you will be redirected to the general setting as shown in the below image. Now click on the “Request Domain Key” option.
Now it will take some time to generate the key, so wait some time and refresh the page.
Now you can set the plugin for auto-update or keep it OFF.
You can add the IP address of your server in the below section as shown in the image to use the inbuild CDN of the Litespeed cache. It will save some time in connecting the Ip address. Otherwise, leave it blank, so that it will connect to the site through the domain name.
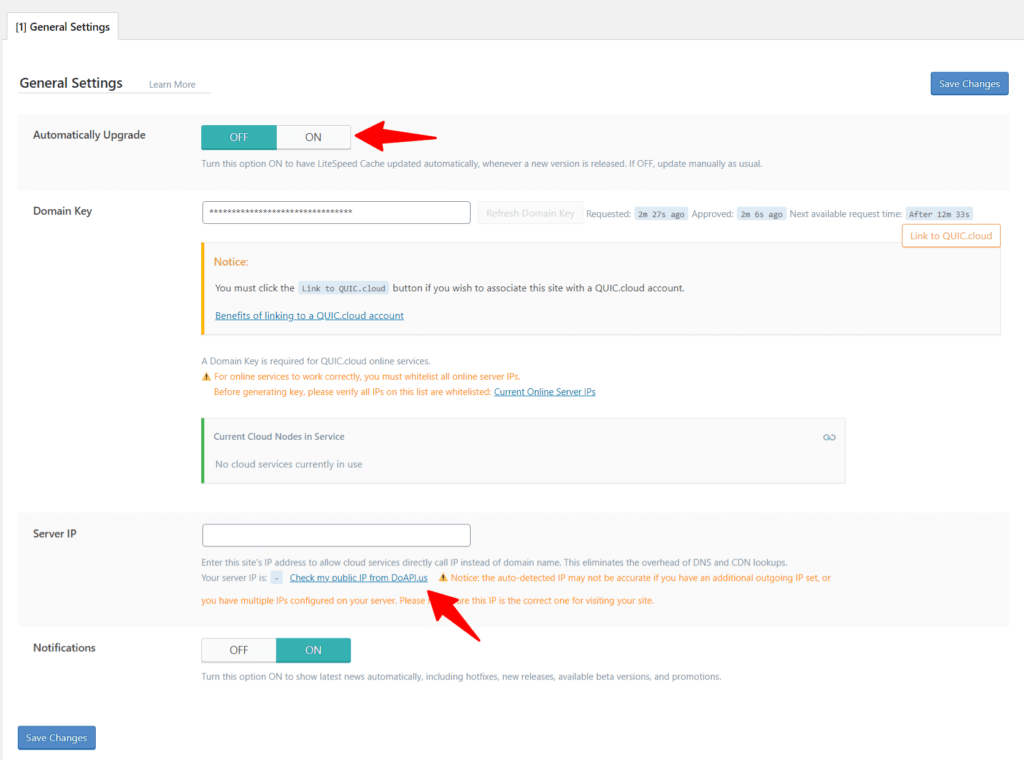
Now you have successfully completed the General setting. Save the settings before moving to the next step.
2. Cache
Now click on the “cache” option on the left side menu of WordPress.
Note: To use the cache function you need to have a lightspeed-based server. So, if your server is different then you can connect the website with the QUIC cloud in the general setting.
So, click the “Link.QUIC cloud” button as shown below and create a free account, and then proceed to the below cache settings.

Ok, let’s start the cache setting.
If you are using the AMP plugin or your mobile version is different from Desktop [exclude responsive design] then click on “cache mobile option”.
Keep all the default settings and click on save changes and your 1st section of cache is completed.
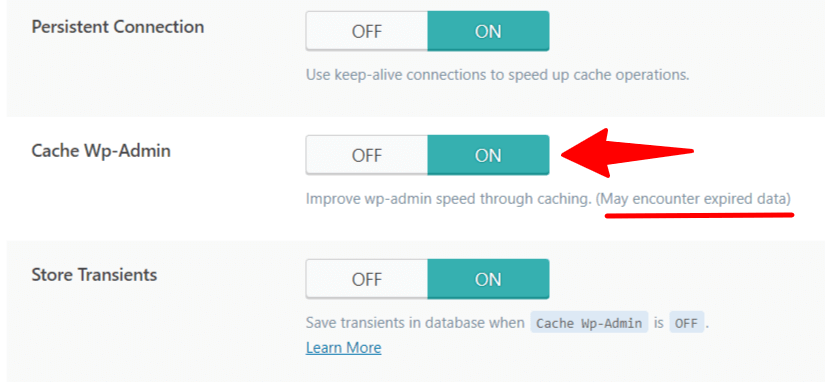
Now you can skip the TTL, Purge, Excludes, ESI options to the default settings and Go to the object section.
Now in the Object option Scroll to the last and you will see the option “Cache Wp-Admin” which is by default. So, if you face any problem in the WordPress login due to a cache issue then you can turn the setting OFF. So, for now, leave it ON and click on the Save button.
Now Go to Browser cache setting [ just next to Object ] and turn this ON and click on the Save button.
Now in the Advanced setting, You will see an option called “Instant Click”, tun this on if you want to enable preload the pages of the links when a visitor hovers over a page link. It will significantly improve the loading of different menus and section of the page but it may consume more server bandwidth.
Now you have successfully completed the Cache settings in the Litespeed cache plugin.
3. CDN
If you want to use the LIght speed CDN [QUIC.cloud CDN] then you can turn this setting ON or you can integrate your Cloudflare CDN [content delivery network] with this plugin.
So, to integrate Cloudflare you need to paste the Global API key, Email Address, and Domain name.
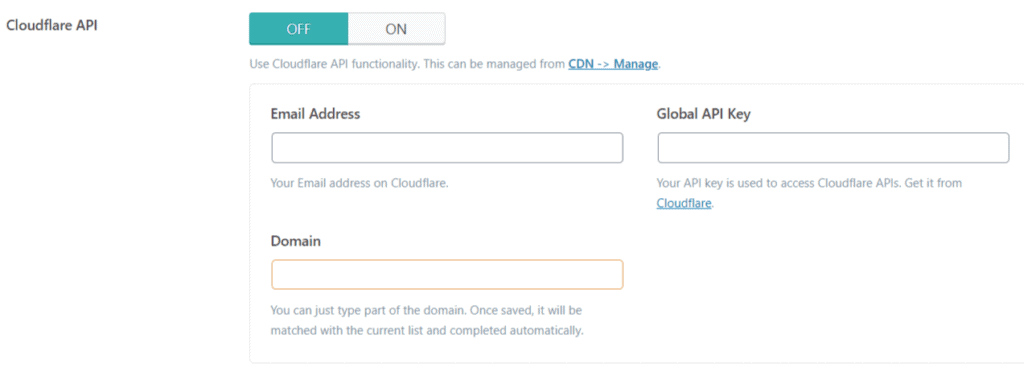
You can take the help of this video on how to generate a Cloudflare Global API key. [coming soon]
So, if you face any problems you can ask me in the comment section, I will help you as soon as possible.
4.LiteSpeed Cache Image Optimization
If you want to optimize your Images using the Litespeed cache plugin then you can do this. Here You can optimize Images with two different methods.
- Lossy
- Lossless
You can also take a backup of your original image, bulk optimize images, and more.
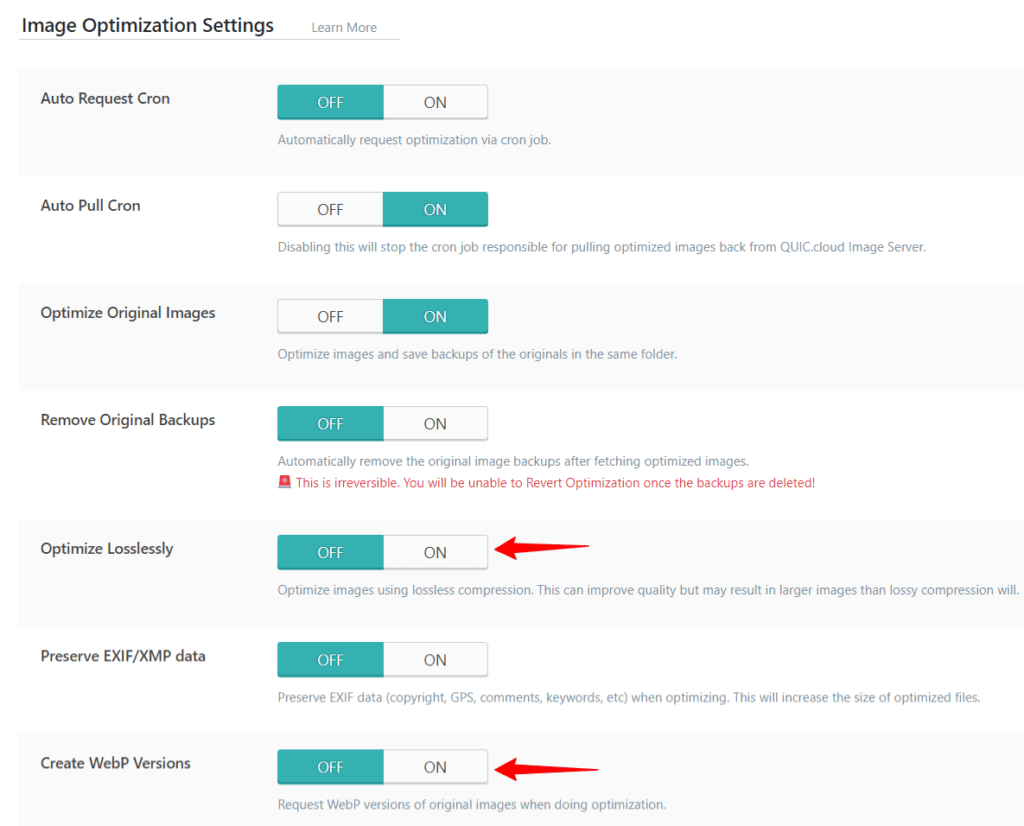
Here are some additional features in Image optimization:
- Remove EXIF/XMP data
- Create WebP Versions
- WordPress Image Quality Control
- Bulk optimization
- Optimize thumbnails
If you want to use a dedicated Image Optimization plugin for your WordPress website then you can check the below article.
🟥 5+ best image optimization plugin for WordPress [ detailed Review ]
5. Page Optimization
The page Optimization section of Litespeed settings is very critical and a little bit tricky. So, you need to try the settings using the A/B testing method.
These settings may break some visual elements of your website so, check your website for any errors in every step. Then you will get an idea about which settings are working properly or not.
But I will share the best LiteSpeed Cache Page Optimization settings so, follow the steps carefully.
1.CSS setting
In the CSS settings Turn ON these settings:
- CSS Minify
- Load CSS Asynchronously
- Generate Critical CSS
- Inline CSS Async Lib
![Page-Optimization-CSS-Setting [Litespeed cache]](https://key2blogging.com/wp-content/uploads/2021/01/Page-Optimization-CSS-Setting-Litespeed-cache-798x1024.png)
Now Turn on CSS Combine and CSS Combine External and Inline options and check if there is any visual error on your website occur. If everything working fine then you can leave the setting ON.
In some cases, these two settings may cause a problem, so use them according to your theme design compatibility.
Now save the setting and move to the next section.
2.JS settings
In the JS setting Turn ON the following settings:
- JS Minify
- JS Combine
- JS Combine External and Inline
- Load JS Deferred
![Page-Optimization-JS Settings [ Litespeed cache ]](https://key2blogging.com/wp-content/uploads/2021/01/Page-Optimization-JS-Settings-Litespeed-cache--1024x677.png)
Here also check any visual error in Javascript and you can turn OFF JS combine setting to solve the problem. Or you can exclude any Java script from this.
3. Optimization
In the optimization setting, you can turn ON HTML minify, Load Google Fonts Asynchronously, and Remove WordPress emojis [ Now the browser use system Emojis].
Now you have more options in this tab like removing Google Fonts, DNS Prefetch Control, Remove Query Strings, etc. So, don’t turn On these if you are not sure about it.
4. Media Settings
In the Media setting Turn On the following settings:
- Lazy Load Images
- Responsive Placeholder
- Lazy Load Iframes
- Inline Lazy Load Images Library
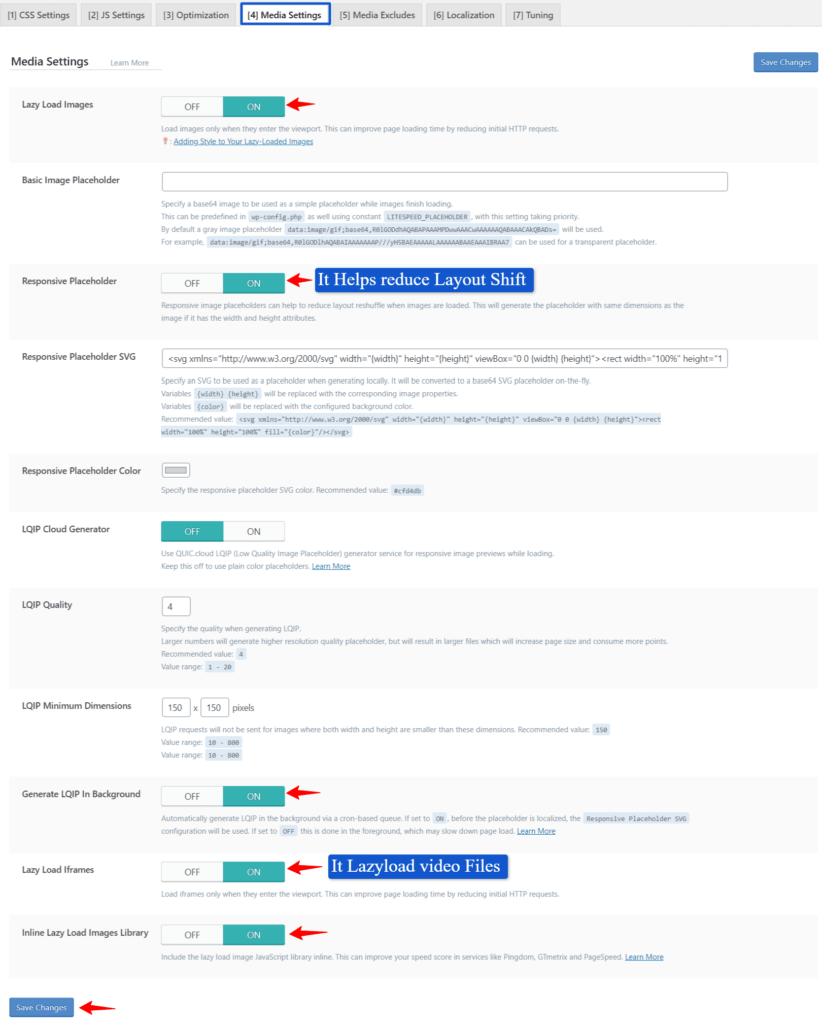
Here You will get the option to lazyload both Images and videos for free. You can also set a responsive placeholder for images to minimize layout shifts. It helps you increase your core web vitals score.
📖 Read more about “What is Core Web Vitals & How to Improve them?”
In the “Media Excludes” Tab you can exclude a specific file to follow the general rule set in the media setting Tab.
5. Localizations
Here in the Localization just turn ON “Gravatar Cache” and leave the rest settings to default. Now save the changes and move to the next section.
6. Tuning
In the Tuning settings of the Litespeed cache, you have the complete freedom to exclude a specific file or URL from applying the CSS, javascript, and other settings.
Now we have completed the Page optimization sections of the Litespeed cache WordPress plugin. Almost all major settings are done.
For more detailed Configurations you can check the Official website.
Conclusion
There are several other settings like Database, crawler, and toolbox. So, don’t change any settings here otherwise your website may break severely. So, it is wise to leave the default settings ON.
Now you can decide whether to Use the LiteSpeed cache [free] or WP-Rocket [paid] plugin for your WordPress website.
If you have any doubts ask me in the comment section and share this post with your Blogging community to appreciate this effort. Thank you.


This is a fantastic post that contains a lot of useful information. I appreciate you writing on LiteSpeed Cache for WordPress since it’s really useful to us.
Well detailed guide, thanks for share few new caching plugins 🙂
Welcome 🤗
Hey Abhishek, this is a detailed guide. Litespeed cache plugin is great when combined with HOSTINGER as they use the same servers.
Overall, it was a worthy read 🙂
Yes, Litespeed cache provide all premium features for free..and better than all free plugin…