What is Core Web Vitals & How to Improve them?
According to Google, User experience is one of the several (approx 200) Ranking factors that they use to rank websites on the search result page.
So, optimizing for a better user experience helps a website to achieve long-term success on the internet. Core web vitals metrics help you measure the user experience on your website and give you opportunities to improve it.
So, let’s understand what it is and how you can improve your score and give your website an edge compared to others.
What Are Core Web Vitals?
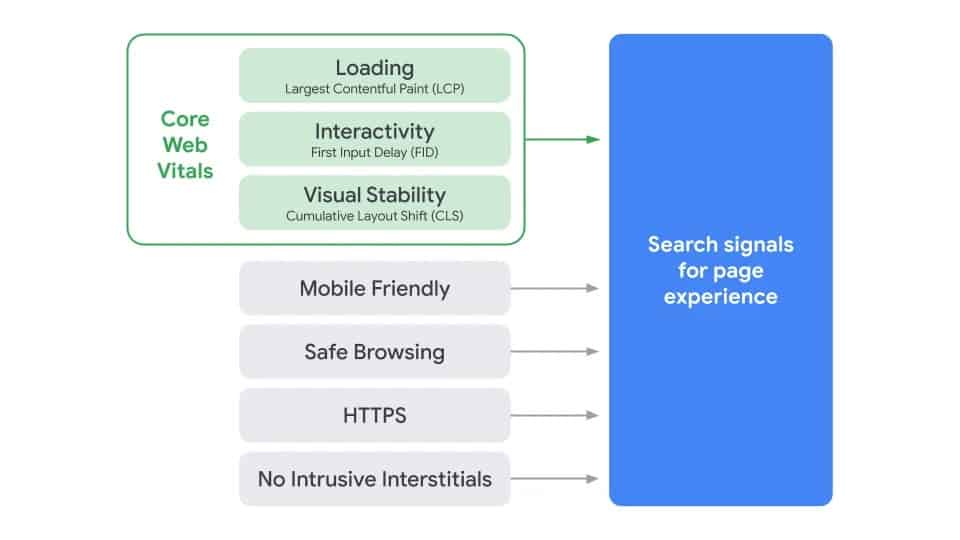
Core web vitals are a set of specific factors that are essential to delivering a quality user experience on the web. It is made of three core page speed and user interaction measurements: largest contentful paint, first input delay, and cumulative layout shift.
In other words, Core Web Vitals are the subset of Web Vitals that are used by site owners and all the Google tools to measure User Experience.
There are several other web vitals like Mobile friendly, safe browsing, HTTPS, No intrusive Interstitials, etc that measure the user experience on a website. But it is very difficult for some users to track all use metrics at a time. That’s why Google introduced the core web vitals concept where it only focuses on the key metrics loading, interactivity, and visual stability.
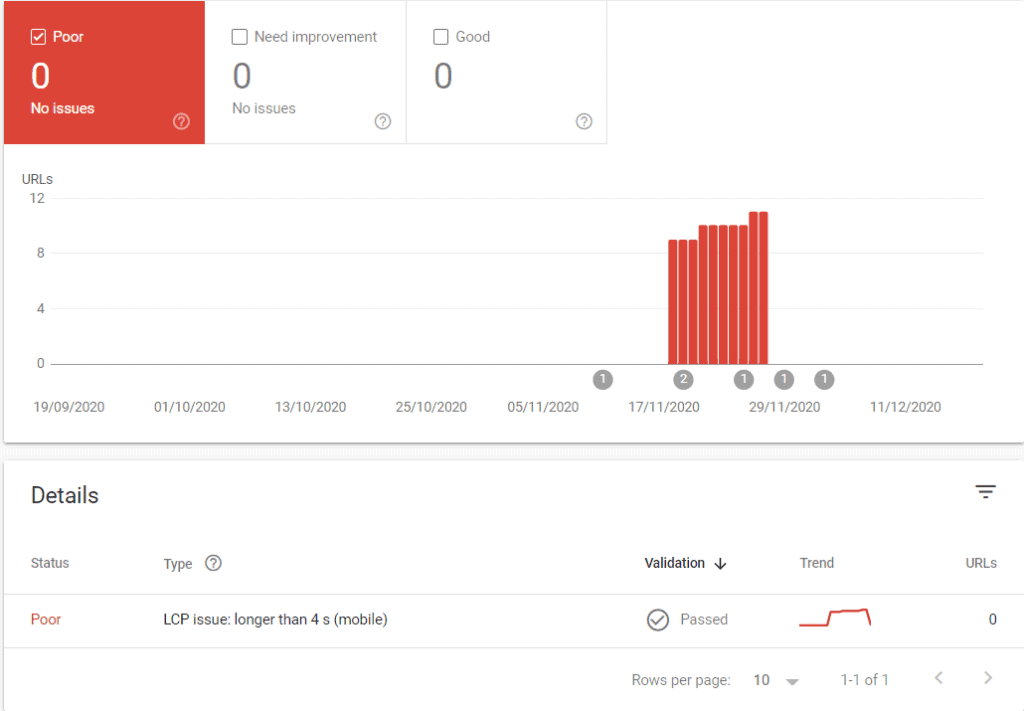
You can track your website core web vitals data in the “enhancements” section of your search console account. You can see the list of pages where the user experience is not that good and it also suggests how you can improve it.
Why are core web vitals important for SEO?
This year Google announced in the Search central blog about the page experience signal.
Earlier Google considers several page experience signals for ranking including:
- HTTPS
- Mobile-friendliness
- Lack of interstitial pop-ups
- “Safe-browsing” (basically, not having malware on your page)
But now they have added the core web vitals in it. It takes a major role in it. A good page experience doesn’t replace relevant content. But it gives you a competitive advantage over the low page experience page.
If the content quality of the two websites is the same then Google uses the page experience signal to choose the winner. That’s why you need to work on the core web vitals of your website.

But, don’t worry you have the time to fix this up until the next year 2021. But Google also uses the past performance score for ranking. That’s why you need to start work on that.
In this article, I will guide you on how you can improve your core web vitals score.
Largest Contentful Paint (LCP)
LCP measures the loading performance of a website. It means how long the website is taking to load the page completely.
It counts the time to load the first visible section of the website. That’s why you can prioritize your resources and load the essential content first.
According to Google, LCP does not exceed 2.5 sec when the page starts loading.
LCP is different from other metrics like Time To First Byte (TTFY) and First contentful paint as it measures the real-world performance from the chrome UX report.
It focuses on the time to load the page for seeing the actual user and start interacting with the webpage.
You can check your LCP score in Google page speed insight. It shows the data by checking the entire website and shows the list of URLs where improvement needs to be done.

You can see the mobile score of my website which is around 60 and this can be improved if I work on my mobile website design. On the desktop, my website score is above 90 but on the mobile device, it is just 60 due to large contentful paint.
But don’t rely upon this score completely as it changes over time and sometimes asks you to remove essential plugins or scripts to improve performance.
You can also see an alert about Large contentful paint in the Google search console. (GSC)
LCP is also further divided into three categories.
- Good
- Needs Improvement
- Poor.
If your LCP is below 2.5 sec then this is considered good, a score between 2.5 sec to 4 sec is considered Needs Improvement, and a score of more than 4 sec is considered poor.
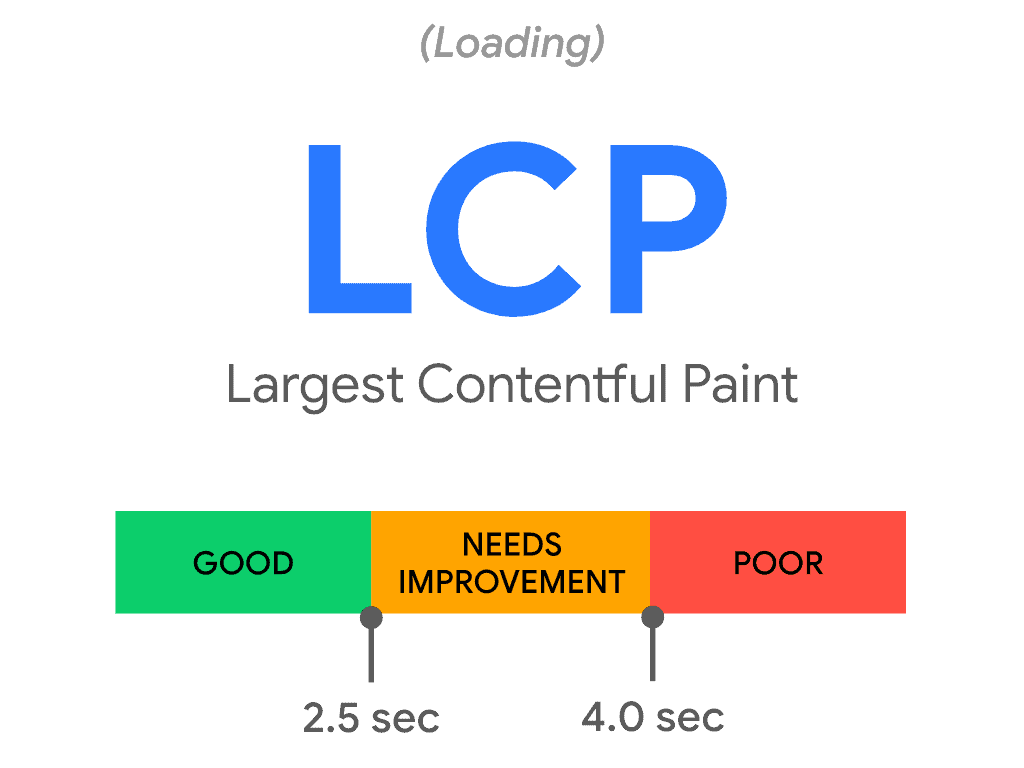
You can also notice that achieving an LCP of less than 2.5 on Mobile devices is very hard. Always try to keep it below 4sec.
Steps to improve the LCP score:
Setup lazy loading
consider using Lazy Loading on your website. If you are using WordPress 5.4 or higher then lazy loading is enabled by default on images. You should focus on Lazy Loading videos as it slows down pages.
Remember that Images that are added at the top should be loaded on the page immediately, therefore you need to exclude those images from Lazy Loading.
Remove any unnecessarily third-party scripts:
Make sure to use the necessary script only and remove all third-party scripts from your website. Make sure to reduce the main thread Blocking to around 150 to 160ms.
If it is Important and You don’t want to remove it completely then you can set a delay on that JavaScript, So that it won’t block the Initial loading of the webpage.
Upgrade web hosting:
Try to use better and more reliable web hosting according to your website size. It plays a very important role in the website loading speed. Most people ignore that Web hosting plays an important role when it comes to Core web Vitals. If your Server is not able to deliver the website file quickly then it is impossible to pass the core web vitals.
So, I recommend you to Get a Better hosting for your website and make sure to enable Object Cache on your server and you can also invest in a CDN service which helps delivery the content faster around the world.
If you don’t know how to choose the best web hosting then you should the Guide on Different types of web hosting with buying guide.
Remove large page elements:
The page speed insight tool shows you the large page elements that you can remove to improve your score.

Minify CSS
Large CSS elements affect the LCP score of a website. That’s why you should minify your CSS code to improve LCP. You can Do CSS Minification using Plugins like LiteSpeed cache, Auto-Optimize, etc.
First Input Delay (FID)
The first input delay measures the time takes the user to interact with your page. This means the time taken by a web browser to process your webpage and the user will be able to interact with the page like click on a Link, scroll the page or enter login details, etc.
The main reason for the delay in user interaction is the main thread-blocking script tasks.
It is very important to keep the FID time low as it directly affects the user experience on your website. Google set the acceptable FID score as below 100 MS.
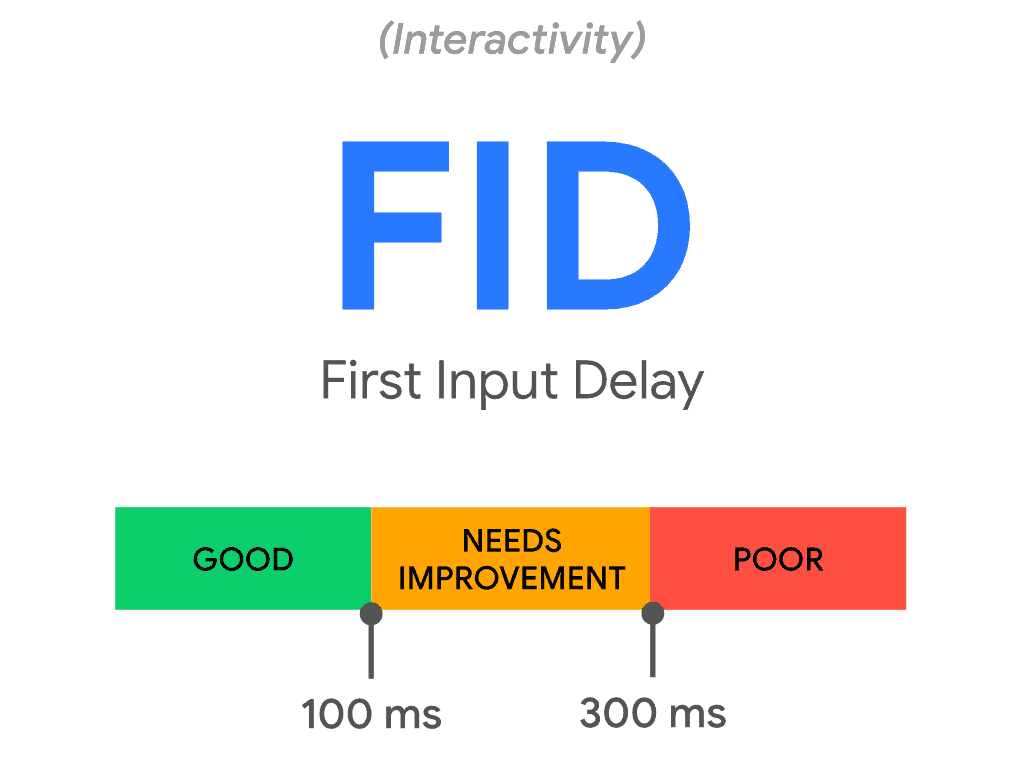
For websites like Blogs or articles, FID does not matter most as the interaction that happens is the scrolling of the page or Zoom in or out, sign up for an email newsletter.
But for the website where login or signup is required, FID plays a major role in it. Because users have to type the login details in the form and when the website takes a very long time to accept the details it will create a very bad user experience.
FID is also important for websites like Ecommerce websites where users have to add the product to the cart and login to the user account. That’s why you need to work on minimizing the First Input Delay(FID).
Steps to improve the FID score:
Remove unnecessary Third-party scripts:
You can improve your FID score by removing unnecessary scripts (like Google Analytics, heatmaps, OneSignal, etc) You can also set a delay on these scripts as it is not required in the beginning.
Defer JavaScript:
If your website is loading javascript at the beginning of the page load then it is challenging for users to interact quickly. That’s why you can enable the Defer JavaScript using cache plugins like WP-Rocket, Litespeed cache, Perfmatters etc.
It will load the javascript files that are not necessary at the beginning of the page load. It will significantly improve your overall website speed.
Enable Browser cache:
By enabling browser cache you will save lots of server resources and your website will not request all the files for old visitors. The browser will load some basic files from the cache file and improve your FID score.
You can use Wp-Rocket, LiteSpeed Cache plugin for Enabling Browser cache in WordPress.
Enable Gzip/ Brotli compression
You can reduce your HTML, and CSS file size up to 80 percent by enabling the Gzip or Brotli compression. You can do this by Cloudflare CDN or from your web hosting dashboard. Most Hosting Companies now Implemented Gzip compressions by default.
You can check if your website has Gzip Compression enabled or not by using an Online tool Gzip/Brotli Compression Test.
Just Enter your Website URL and it will show you if Gzip or Brotli compression is enabled or not.
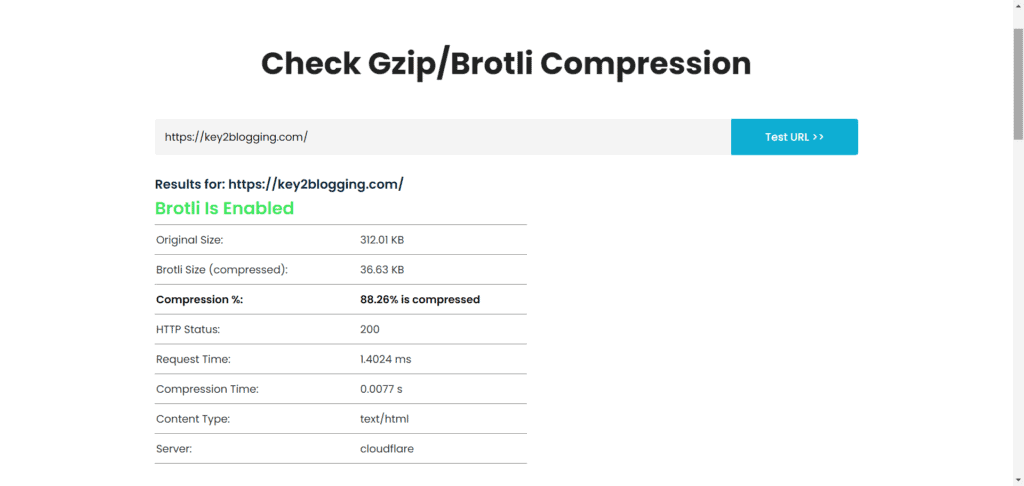
As you can see By using the Brotli Compression, We can deliver the webpage with a whooping 86% reduction in page size. You can use any one of the compression method but Brotli is a better option.
Cumulative Layout Shift (CLS)
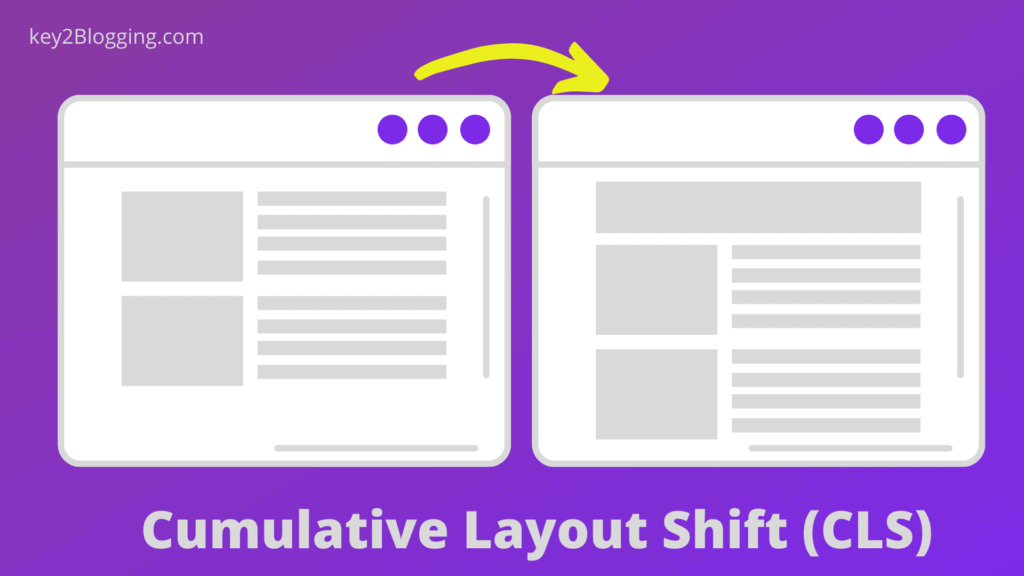
Cumulative layout shift focuses on the overall visual stability of your website. This usually happens due to DOM manipulation or the lack of dimension attributes for major media elements.
According to Google CLS should be below 0.1. You can better understand how cumulative layout shifts happen in the website in the below graphics.
Steps to improve the CLS score
Use set size attribute dimensions media files (video, images, GIFs, infographics, etc.):
You can define a specific size of media so that the user browser knows how much space that element is going to take. So, that it won’t change after the page is fully loaded.
You can simply assign the Height and width of an image in an Absolute pixel so that Browser will know how much space the image going to take and reserves that space before the image load.
Reserved space for ad placement
If you are using auto ads on AdSense then your ads show randomly and sometimes it pushes the content below to show ads. That’s why you need to reserve some specific space for ad placement on the website.
You can wrap your AdSense Code with a div tag with Height and width assign Like this as shown below. You can change the Height According to the page layout and Ad Sizes.
<div style="width:100%; height:320px">
<!-- Add your AdSense Code below -->

</div>
Add new UI elements below the webpage:
If you are using some UI elements like pop-ups then you can show them at the bottom of your website. In this way, it won’t push the content down and improve your CLS score.
Video Tutorials
I recommend you to Follow the video Tutorial on LiteSpeed Cache which is one of the Best free Performance plugin Out there.
If you are looking for an Premium option then you can either use the WP Rocket or the Perfmatters plugin.
Here is a details Setup video on Perfmatters.
Conclusion
Core web vitals are some of the best user experience signals that developers and website owners have today. If you follow the above guideline properly you can easily improve your overall speed and improve your core web vitals score.
Now it is your turn.
Which method are you going to try first, let me know in the comment section?
If you like this article, do share it with your blogging community on social media.






Abhishek the article is awesome
But can you please help me how can I Reserve space for ad placement. I’m using Ad Inserter free plugin. Because of Ad my CLS score is too high.
Thanks in Advance
Use the Lazyload functionality wisely as it sometimes causes the problem and set fixed height and width for the ad unit. You can also use a caching or ad management plugin to reserve space for the Ad. Avoid auto ad unit.