How to Enable Two Factor Authentication (2FA) in Cloudflare

Cloudflare is a popular FREE CDN that most site owners use to manage their DNS and improve website speed. So, to protect your website, you should enable two factor authentication (2FA) in Cloudflare.
Two factor authentication also called two step verification is an additional layer of security while login into the account. So, every time you log in to your Cloudflare account, it asks you to enter the password along with a one time password (OTP).
So, even if some hackers bypass your password, they can’t be able to access your account as the One-time security code changes every 30 seconds.
so, follow the steps as shown below to secure your Cloudflare account.
Steps to enable Two Factor Authentication in Cloudflare
To enable two-factor authentication in Cloudflare you need to follow the steps given below or you can watch the below video.
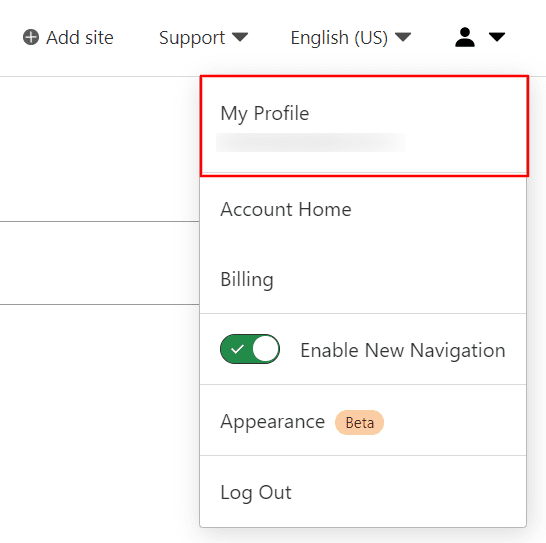
1. Login to your Cloudflare account and select the profile icon
Go to the Cloudflare dashboard by entering the username and password. Now select the Profile icon that you see at the top right corner.
2. Select the authentication option
Now select the “authentication” option just below the preferences in the top left-hand corner.

Here you will see two options one is to change the password and the second one is to add Two factor authentication in Cloudflare.
So, select the 2nd option and proceed to step 3.
3. Select the Mobile App authentication method
Now you will ask to choose any of the two methods as shown below. You can either use a security key or a mobile authenticator app.
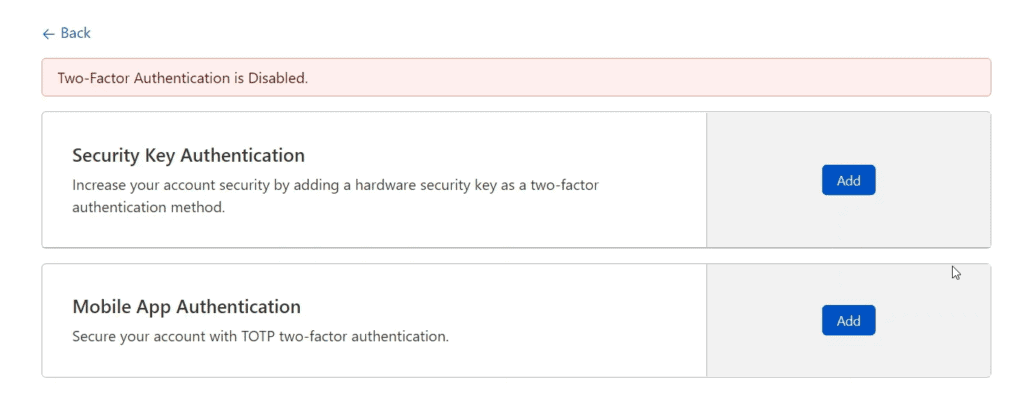
So, here we will choose the second option which is Mobile App authentication.
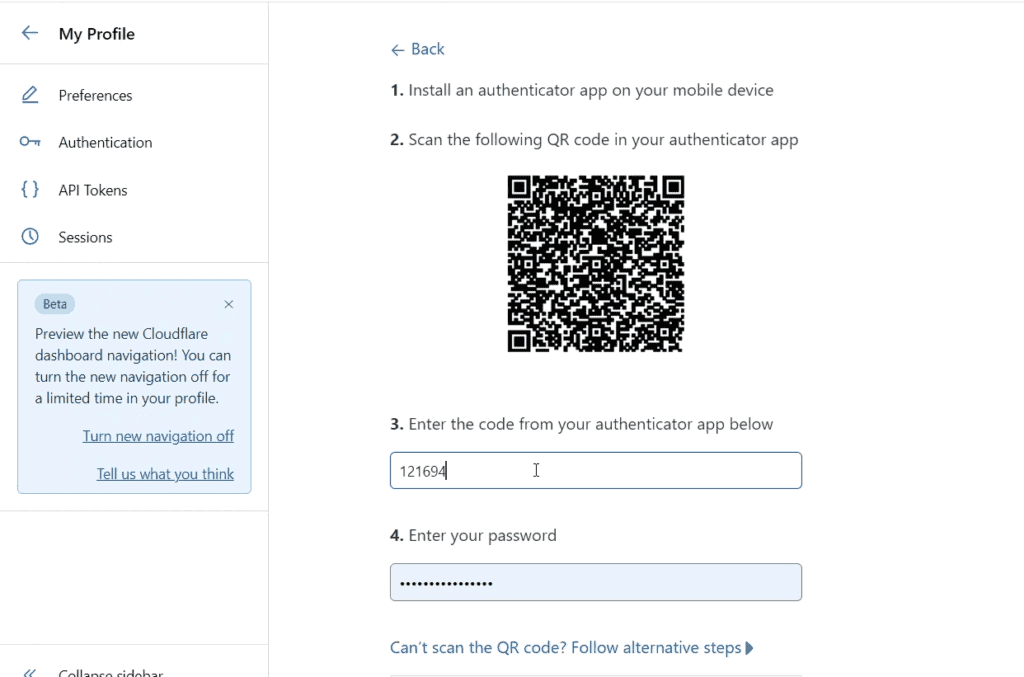
Now it will ask you to Scan the QR code from your authenticator app as shown in the below image.
4. Install Authenticator App on your smartphone
Now install any of the authenticator apps on your smartphones like the Google authenticator, Microsoft authenticator, Authy, etc.
Here, In this tutorial, I will use the Google authenticator App but the process is nearly the same for any other App.
After installing the Authenticator App, you need to scan the QR code in Cloudflare and it is added to your App.
5. Enter the authenticator code in Cloudflare
Now you have to enter the authenticator code and your Cloudflare password to move to the next step.
Now it again asks you to enter the Cloudflare password to confirm the action.
6. Download the backup codes and complete the setup
Now you can download the backup codes and proceed to the final step. Backup codes help you access your Cloudflare account without the authenticator app.
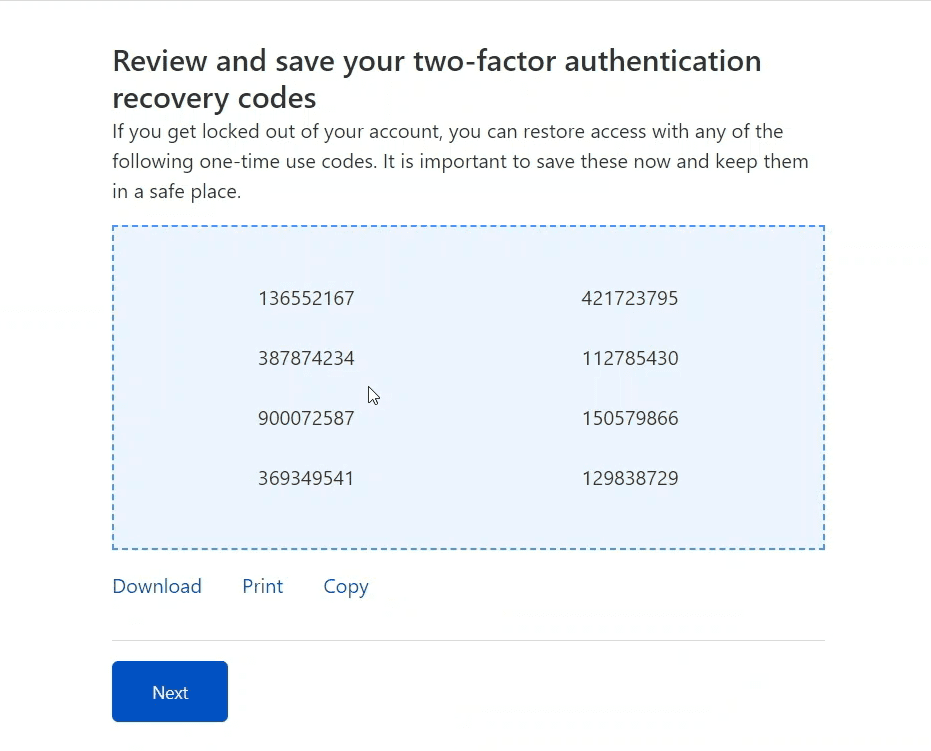
Here, note that you can use each of the backup codes once. So, use it in case you have lost access to your authenticator app or smartphone.
After that, you can turn off the 2FA easily.
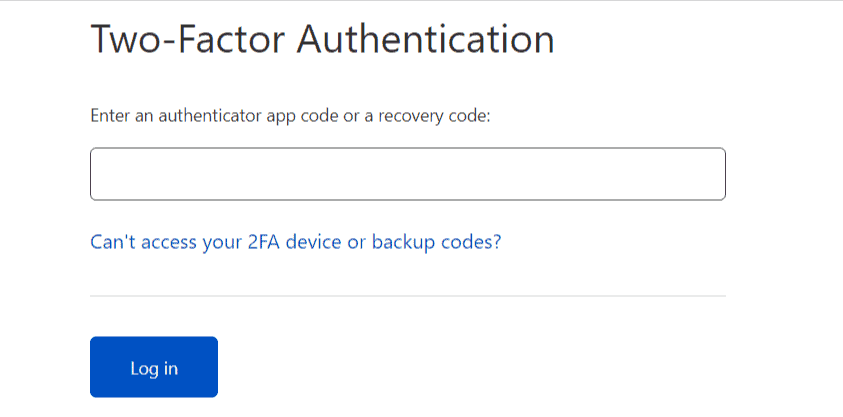
Now, whenever you log in to your Cloudflare dashboard by entering the username and password, it will ask you to enter the two factor authentication code.
I hope you got the idea of how to enable two factor authentication in Cloudflare. If you have any doubts feel free to ask me in the comment section.
Don’t forget to Subscribe to our Youtube channel for more Blogging and SEO tutorials like this.


