Add Button in Navigation Menu of Generatepress theme using CSS (Easily)
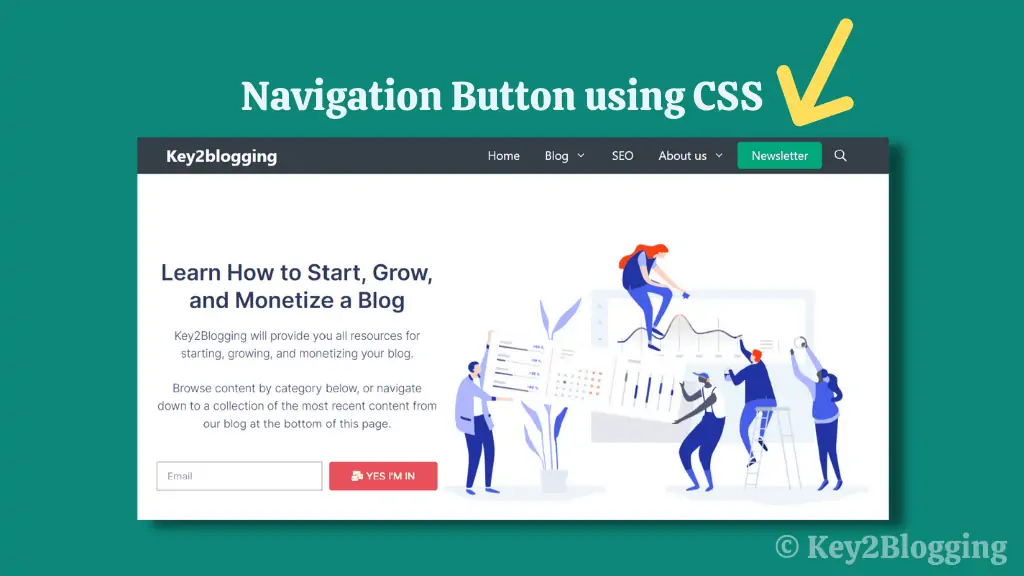
In this Generatepress tutorial, I will show you how to add a call-to-action button in the navigation menu of the Generatepress theme.
Adding a button in the menu of the Generatepress theme is quite simple and you don’t require any additional plugins.
I know most of the premium themes provide this functionality by default and don’t require any coding for that but in Generatepress you don’t have this feature built-in. You have to do it manually by adding some CSS code.
Don’t worry this is not that technical and you can easily add a button in the menu by following this step-by-step guide given below.
Benefit of adding a button in the Navigation Menu
Adding a button to the menu gives a professional look to your website and can help you increase the click-through rate of any link that you want to draw user attention to.
You can use a call to action button in the menu like Subscribe, Newsletter, Contact us, Latest deals, etc. It helps you generate more leads and sales.
How to add button in the menu of Generatepress theme
To add a button in the navigation menu follow the below steps one by one.
Step-1: Go to WordPress dashboard > Appearance > Menus section.
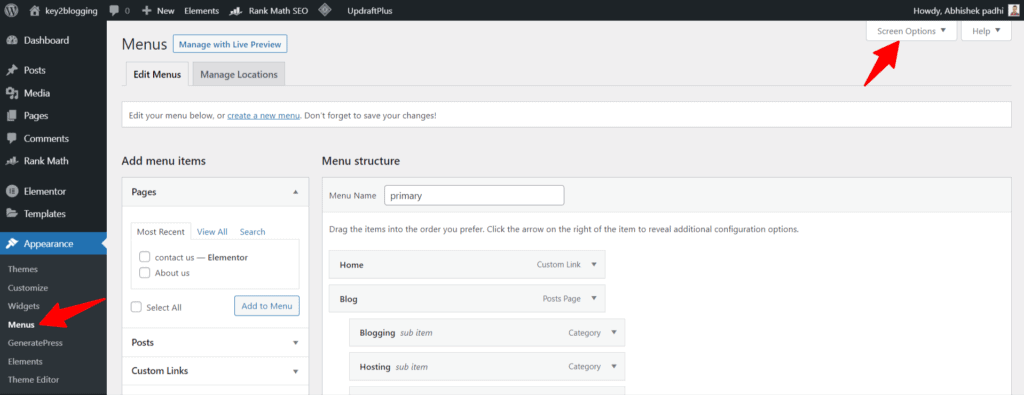
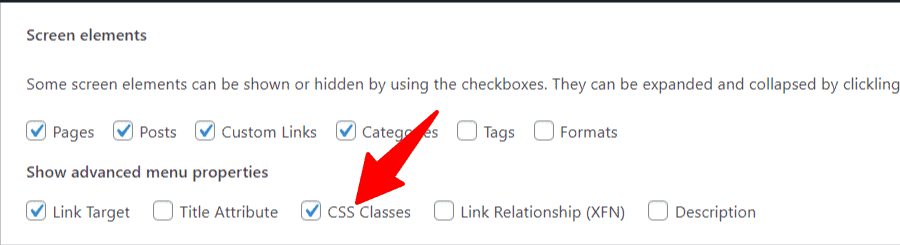
Step-2: Here in the top-right menu, click on the “screen option” and turn on the “CSS classes” option.
Step-3: Now create a custom link and add a CSS class (menu-button) as shown in the below image.
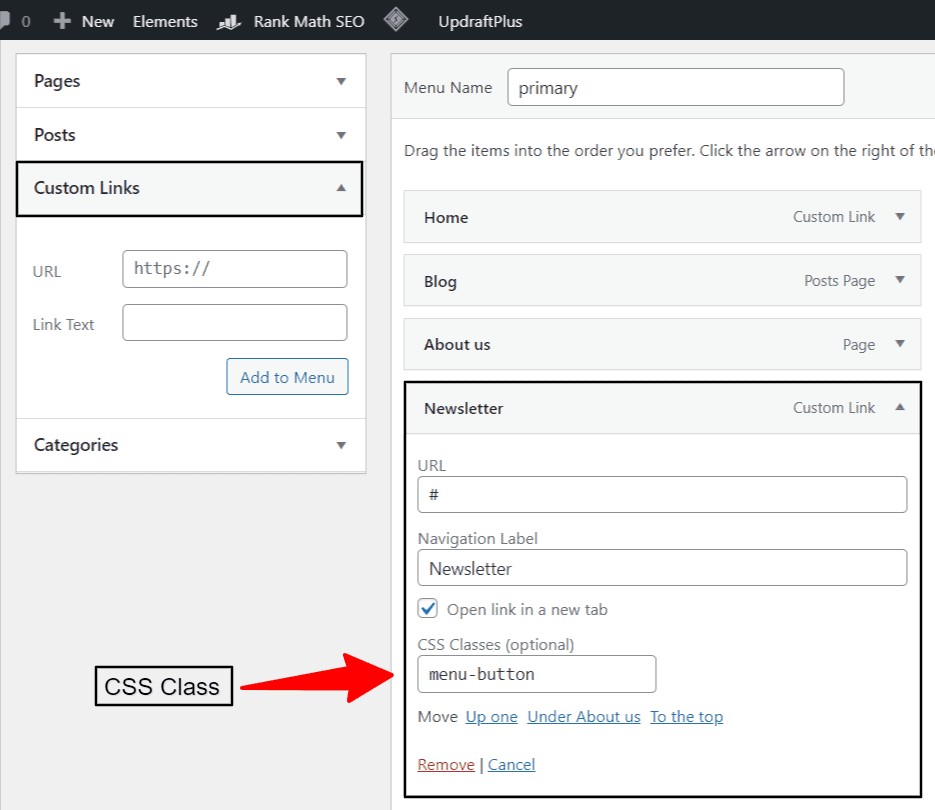
Step-4: Now add the URL link and Button label and save the menu.
Step-5: Now Go to Appearance > Customize > Additional CSS section.
Step-6: Here Paste the CSS code and hit the publish button.
Copy CSS code
.main-navigation:not(.toggled) ul li.menu-button a {
	border-width: 1px;
	background: #00a87a;
	border:2px solid #00a87a;
	border-radius: 6px 6px 6px 6px;
	color: white;
	line-height: 40px;
}
Now your button is added to the menu of your WordPress website. Now you can further customize the button.
Customize Navigation button
Now to customize the Navigation Button you can tweak a little bit in the CSS code.
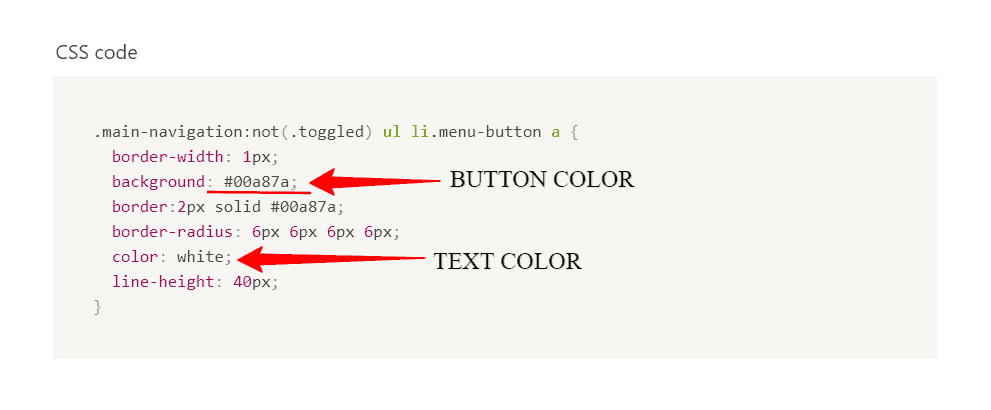
Here in the background: #00a87a; you can change the button color by changing the hex code. You can add your brand color code to match the website design.
You can also change the border radius to make the button rectangular, circular and any other shapes.
Here in the color: white; section you can replace white with any color code and it will change the color of the text use in the button.
You can also add a hover effect to the navigation button by adding a CSS code below it.
.main-navigation:not(.toggled) ul li.menu-button a:hover {
  color: #ffffff !important;
  background-color: #196f8c;
}
Here you can change the hover color by changing the “hex code” in the above CSS code.
Note: You can get the hex code from the website called HTML Color Codes or use a color picker chrome extension.
In this way, you can easily add buttons to the navigation menu of your Generatepress theme and customize it to match the color scheme of your WordPress website.
You can use this code with other themes by changing the CSS class of the navigation menu (here main-navigation).
New CSS Code to Add Button in Header Menu in WordPress

#primary-menu .join a {
    padding: 18px 32px;
    background: #da394a;
    color: #fff;
    font-weight: 700;
    font-size: 18px;
    border-radius: 8px;
    border: 1px solid #da394a;
    line-height: 1;
    margin-left: 20px;
    transition: all .2s ease-in-out;
    font-family: open sans,sans-serif;
}
#primary-menu .join a:hover {
    transform: scale(1.1);
}
If the above code is not working on your theme, you can use the below modified CSS code. (Tested with Popular Themes Like Astra, GeneratePress Theme etc.). In some cases, you need to adjust the height and width of the button along with the font size and other values.
.join a {
    padding: 10px 32px!important;
    background: #da394a!important;
    color: #fff!important;
    font-weight: 700;
    font-size: 18px;
    height: 50px!important;
    width: fit-content!important;
    border-radius: 8px;
    border: 1px solid #da394a;
    line-height: 1;
    margin-left: 20px;
    display: flex!important;
    justify-content: center;
    align-items: center;
    transition: all .2s ease-in-out!important;
}
.join a:hover {
    transform: scale(1.1);
}
Conclusion
I have shown you how to add a button in the navigation menu of the Generatepress theme.
If you have any doubt regarding the button customization or any other WordPress customization, you can ask me in the comment section. Or, you can connect me on Twitter.
Read more WordPress tutorials Here. 👇


please can you tell me how to add this button to the same link in mobile device because it works only on the desktop like you mentioned in this article
Hello Bro thanks for your time for this tutorial. please may I know if I can use the same CSS code for two buttons on the same Manu? Donate and Volunteer, I was able to create another button but I was unable to space them there were together kindly let me know if there is a code to space these buttons
For this you can set the property margin-right: 20px; in the first button and it will create a 20px space to the right side of first button
This is a great tutorial! I’m new to CSS and after following the instructions and copying and pasting the code from above into ‘Additional CSS’, the button doesn’t update like it does in your video and no changes are applied. Am I missing something?
Hey, You have to change class in some cases as different themes use different classes for the same thing. Here, I am using the generate press theme. Just click on the element and inspect it. Now you will see the class in the CSS section.
tks for your help, how can we make the button look nice and smaller for the mobile menu? do we have to add some code?
This button will not show on Mobile devices and works as a regular link. But you can also add the button in Mobile using the media query in CSS. And if you want to make the button smaller then you can adjust the line height, border in the CSS menu. You can control the Header menu size from the Theme customizer.