How to Verify Your WordPress Website on Pinterest (Step by Step)

Do you want to verify your wordpress website on Pinterest?
Pinterest is one of the most popular image search engines that helps you bring organic traffic to your website, generate leads and sales.
So, verifying your website on Pinterest helps you unlock analytics tracking and you will be able to participate in the ad program.
So, In this tutorial, I will show you the easiest way to verify your wordpress website on Pinterest.
Why do you need to verify your website on Pinterest?
Pinterest is widely used by people who are searching for visual content to discover new ideas, solve their problems through images and videos.
So, creating a Pinterest profile and verifying it with your website gives your account a professional look and helps people connect to you through your brand.
So, whenever someone shares your website’s image on Pinterest, it will add your domain name below the pin with a follow button.
So, Users can easily find the original image and follow you easily. So, your chances of getting more followers on Pinterest are increased.
You can also be able to track the performance of your Pinterest pins and help you understand your audience.
If you want to gain more organic traffic to your website, then you can follow the Proven Pinterest SEO strategy here.
How to Verify Your WordPress Website on Pinterest
To verify your Wordpress website on Pinterest you need to convert your existing personal account to a business account and verify it using the HTML tag or txt record.
So, if you are a visual learner then you can watch the quick video tutorial here.

Step-1: Create a Pinterest Account
To create a Pinterest account, Go to pinterest.com and signup with an Email address or use the Facebook or Google signup option.
Now it will ask for some basic information like Gender, country and language information, favorite category and your account will be ready.
Step-2: Upgrade Your Pinterest Account to Business
Now to verify your domain name, you need to convert your personal account to a business account.
So, click on the down arrow icon in the top right corner and click on the convert to business option.
Now it will show a detailed comparison table between the personal account and business account.
Here, note that you can easily convert your Pinterest account to a business account for Free.
Now click on the convert account option and it will ask you to fill up the brand name, website address, and language and country information.
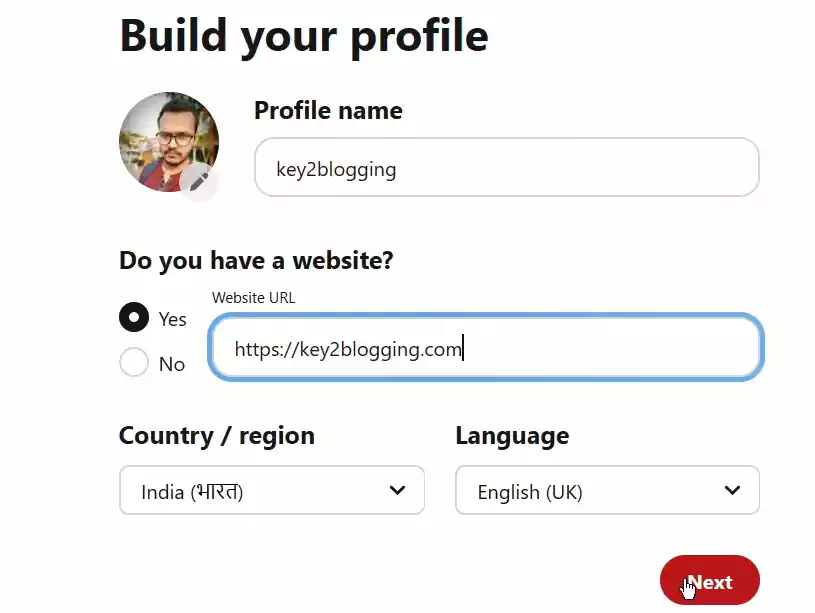
Now click on next and it will show an option like Describe about your business.
So, here in my case, I will select Education and here you can pick up to 3 goals in the below options.
After that, you will ask to fillup more information about the business and whether you want to participate in the Pinterest ad program. Now your Pinterest is converted to a business account.
Step-3: Claim Your Website on Pinterest
To claim or verify your Wordpress website, Go to Settings and click on the claim option. Here you will see different integration options like website, Instagram, YouTube, etc.
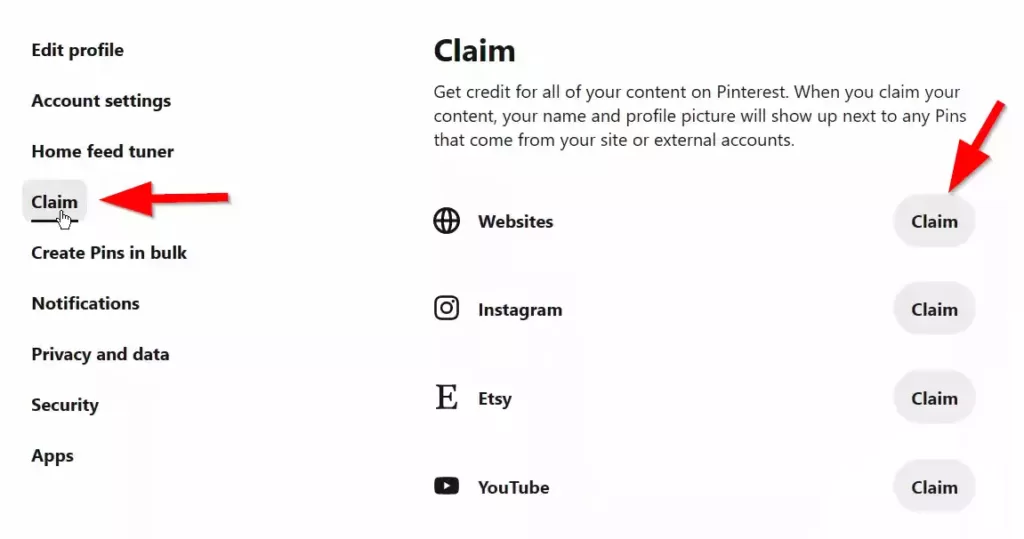
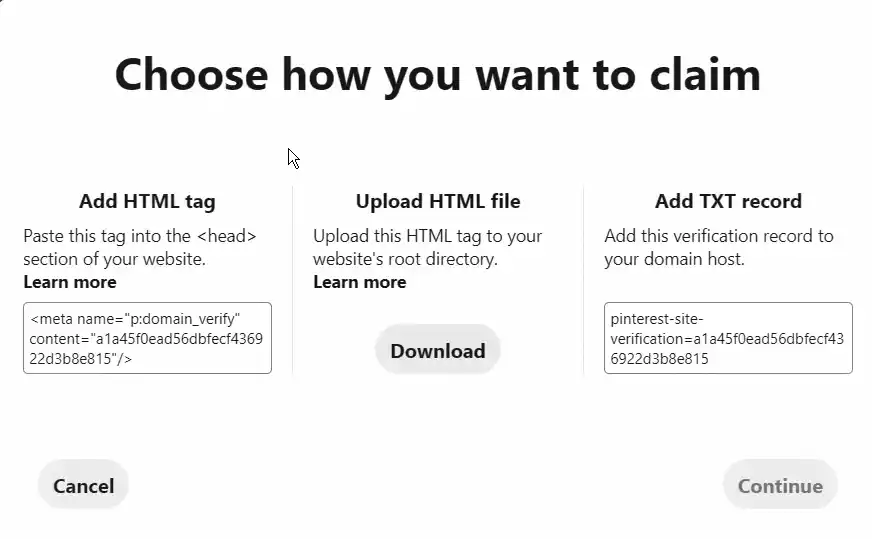
so, click on the claim button after the website and it will show a popup asking to verify the website using any of the three methods.
- Add HTML tag
- Upload HTML file
- Add TXT record
Let’s understand how to Wordpress on Pinterest using the HTML tag method.
HTML tag method
You can add HTML tags in wordpress in multiple ways like adding it through SEO plugins like RankMath, Yoast SEO plugin or directly paste the code in the head section of your theme code.
Or you can use a code management plugin like Header Footer Code Manager that lets you add the HTML tag in the head section of your website.
so, to add an HTML tag in wordpress through RankMath, Go to RankMath > General setting.
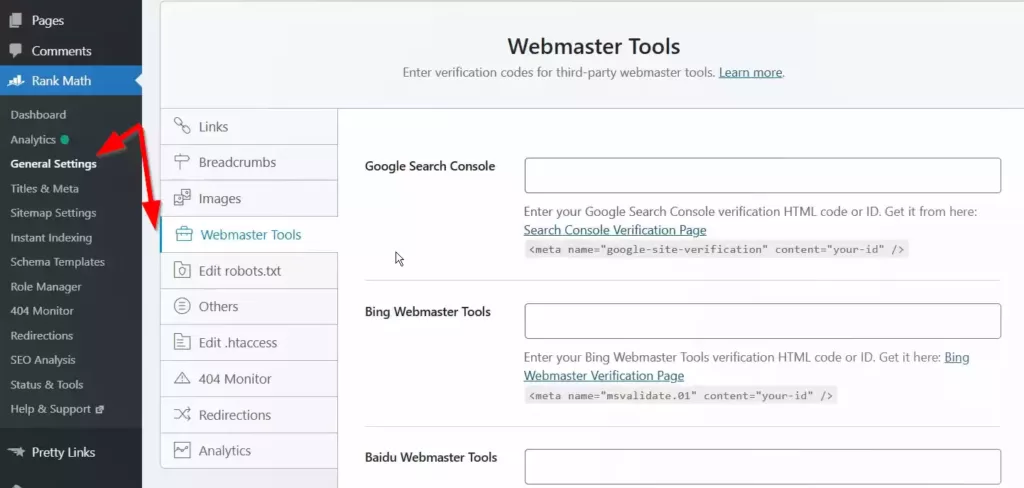
Here, select the webmaster tools on the left side and scroll down to see the Pinterest verification ID option.
Here, paste the HTML tag and save the settings, and your wordpress website is now verified on Pinterest.
If you want to add the HTML tag in wordpress without any plugin, then go to Appearence> theme editor and open the header.php file.
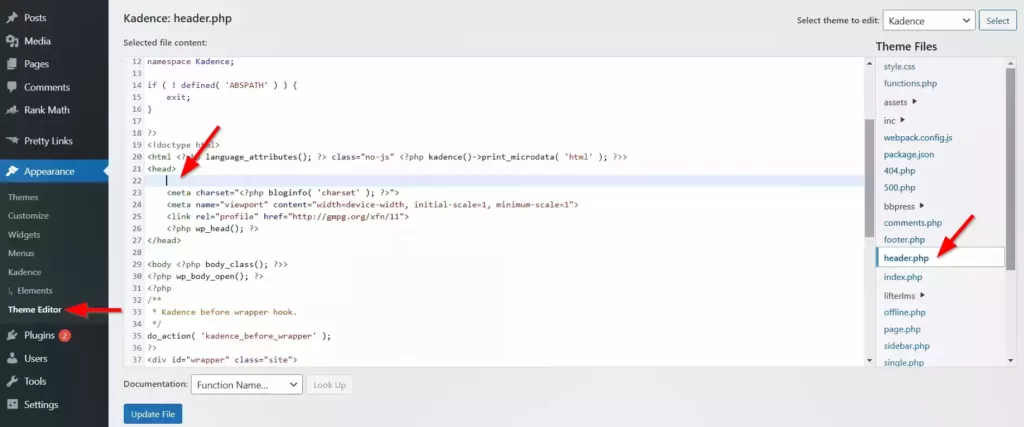
Now paste the HTML tag just below the <head> tag and update the file.
Note: Take a backup of your theme file before changing anything in it.
Upload HTML file
You can also download the HTML file from Pinterest and upload it to the root directory of your website.
For this, you need to log in to your hosting provider and in the Cpanel, you have to search for the file manager option.
Now you have to search for the folder called public_html where all of your wordpress files are stored.
Here upload the HTML file and your wordpress website will be verified on Pinterest. But, I recommend following the other two methods as they are risk-free, and no need to login into the hosting panel.
Add TXT record
You can also verify your wordpress website on Pinterest using the txt record method.
Just login to your domain registrar like Godaddy, Namecheap, and open the DNS settings. And if you are using Cloudflare on your website then you can manage your DNS settings within the Cloudflare dashboard.
So, in the DNS settings click on Add new record, and in the type section selects TXT, and in the name, section type @ and paste your TXT record in the content area.
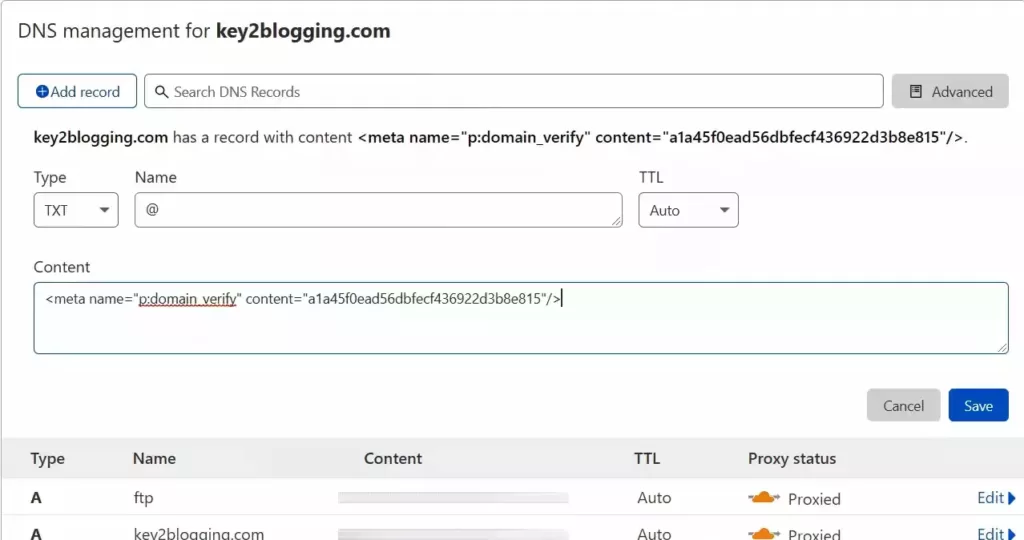
Now save your records. Go to your Pinterest account and click on verify. Now it will take some time to process this and your wordpress website will be verified on Pinterest.
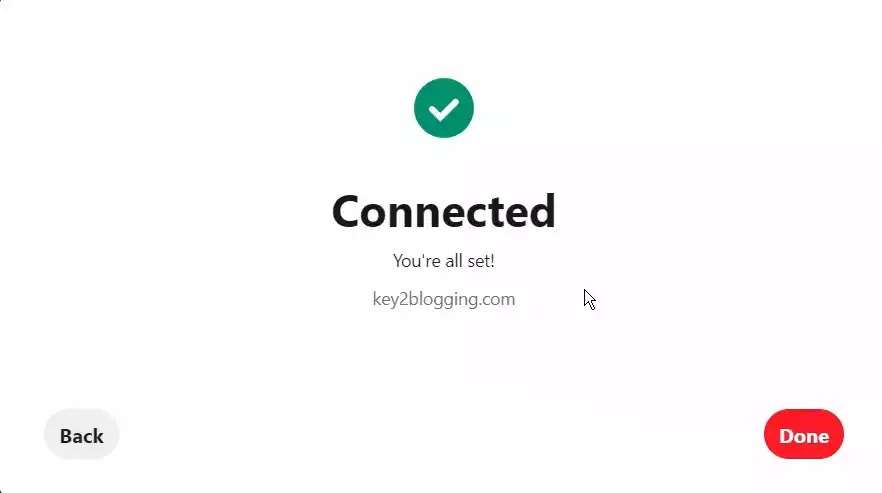
Now you have understood 3 ways to verify your wordpress website on Pinterest. Now whenever someone shares your website image on Pinterest, it will show your domain name below the pins along with a follow button.
So, in this way, you can increase your followers on Pinterest and generate more leads and sales.
You can also track more insight about the Pinterest pins like the number of impressions and clicks, audience insight, and more.
If you have any questions regarding this topic then you can ask me in the comment section and for more tutorials like this, you can subscribe to our Newsletter here.
You can also connect with me on Twitter and Subscribe to our Youtube channel Here.