10+ Easy CSS tricks for WordPress Customization. (Replace plugins with CSS)
Do you want to style your WordPress website without adding additional plugins, then this article will help you.
Here, in this article, I will show you how you can customize your WordPress website and give it a professional look by using the default Gutenberg blocks and Custom CSS.
GeneratePress is one of the fastest themes out there for WordPress and the total code size is less than 10KB. It loads super first and gives you a better user experience. But, to add most of the advanced features you need some CSS codes.
You can also consider the Kadence theme which has a free version and works better than the Free GeneratePress Theme. It has also a premium Plan where you get more functionality including hook elements.
In fact, if you are using the Kadence theme then you don’t need some of the CSS codes and you can easily apply the functions using the theme customizer.
So, without further delay, let’s start the customization one by one.
Customize WordPress using CSS code
To add CSS code in WordPress Go to Appearance> Customize > Additional CSS.
Watch this video to learn how to apply the CSS in WordPress and add different functionality without using any plugins. 👇
1. Box shadow in Images
Box shadow in images gives the images a professional look and attracts users’ attention. You can easily apply the box-shadow effect around your images using a simple CSS code.
.wp-block-image img,
.featured-image img,
.post-image img {
    box-shadow: rgba(23,43,99,.2) 0 7px 28px!important;
}
Here the code target all the images in the archive pages and blog post pages. If you want to exclude the shadow effects in archive pages and apply them only to the blog post images then you can remove the .post-image img code here.
If you want to apply the shadow effect in featured images only then remove the wp-block image and post-image class.
Here, Note that the above code is for the Generatepress theme. If you want to use this on any other theme then you have to replace the CSS class.
For example, the CSS code for the Kadence theme will be like this.
.entry-content img {
    border-radius: 5px;
    box-shadow: rgba(23,43,99,.2) 0 7px 28px!important;
}
You can also add different drop shadow effects by changing the box-shadow code. You can find a lot of CSS Box shadow codes here.
2. Box-shadow in the sidebar
You can also apply the Box shadow effect to your sidebar by using this CSS code.
.sidebar .widget {
	box-shadow: 0 0 27px 0 rgb(214 231 233 / 52%);
}
Here also you can change the shadow effect style by changing the box-shadow code.
3. Disable Copy paste of text
You can easily disable the copy-paste function in your WordPress website using a simple CSS code.
It will protect your content from being copied by others by disabling the copy-paste function. You can exclude certain areas and allow copy-paste by adding that CSS class.
body {
-webkit-user-select: none !important;
-moz-user-select: -moz-none !important;
-ms-user-select: none !important;
user-select: none !important;
}
The above CSS code blocks the copy-paste function completely and works throughout the website. But, you can exclude a certain area like the Code box, quotation Box, etc.
Just add the below code after this code and it will exclude those areas and allows the copy of the text.
.post blockquote,.wp-block-code code {
-webkit-user-select: text !important;
-moz-user-select: text !important;
-ms-user-select: text !important;
user-select: text !important;
}
If you want to exclude more areas then you can add the class of the container in the above code.
Read Also: How to add Author Box in GeneratePress (without Plugin)
4. Hide the URL field in the Comment section
Comment spam is a major problem in Blogs which is really annoying and we can’t moderate every comment especially when we get high traffic.
But, you can hide the URL field of the comment section by using the CSS code given below.
.comment-form #url{
	display:none;
}
Note that it hides the URL field from the comment area for the actual users but it won’t stop spamming comments with links from automated bots.
5. Underline Hyperlink
You can easily customize your hyperlinks on your WordPress website using CSS code. You can add an underline below hyperlinks, add a hover effect, and more.
.entry-content a:not(.wp-block-button__link), .entry-summary a, .nav-links a {
	border-bottom: 2px solid #71c21b;
}
Here in this code, I have excluded the button links inside the blog post. You can also remove underlines from navigation links by removing the navigation class (.nav-links a) from this CSS code.
You can also change the width (2px) and color (#71c21b) of the underline by changing the CSS code.
You can easily find HTML color codes for your website by using the colorzilla chrome extension or choose it from Websites like HTMLcolorcodes.
6. Sticky Sidebar in GeneratePress
You can easily enable a sticky sidebar in your GeneratePress theme using CSS code. Just paste the code inside the Additional CSS section and it’s done.
/* GeneratePress Sticky Sidebar */

@media (min-width: 769px) {
.site-content {
  display: flex;
	}

.inside-right-sidebar {
  height: 100%;
	}

.inside-right-sidebar aside:last-child {
	position: -webkit-sticky;
	position: sticky;
	top: 40px; /*Adjust position */
  }
}
It will stick the last widget in your sidebar when a user scrolls down to the bottom. It will be super helpful to show some related posts or deals in the sidebar to increase conversion.
You can also further customize the Sticky sidebar in GeneratePress using other CSS codes. You can add a sticky sidebar only on the Blog page or archive page, stick to the first widget, and more.
You can check the complete Guide on How to apply the sticky sidebar in GeneratePress here.
7. Display the Last updated date meta tags
You can easily add a last updated date to your Blog posts to let the readers know about the date of publish and the last updated date.
Just copy the below CSS code and paste it into the Additional CSS section.
.posted-on .updated {
    display: inline-block;
}

.posted-on .updated + .entry-date {
    display: none;
}
.posted-on .updated:before {
    content: "Last Updated » ";
}
If you want to show last updated date in the Generatepress theme, then you should follow the updated Guide here.
8. Apply smooth scroll in Anchor Links
Now you can easily add a Table of content to a WordPress website using the native HTML anchor feature. But, the problem is when someone clicks on the jump link it will not scroll smoothly.
You can easily add a smooth scroll effect using CSS code and you don’t need any additional plugin or JavaScript code.
/*smooth Scroll Toc*/
h2[id], h3[id] {
	scroll-margin-top: 50px;
}
html{
  scroll-behavior: smooth;
}
@media (prefers-reduced-motion:reduce){
	html{
		scroll-behaviour: auto;
	}
}
Here, this code only works for h2 and h3 tags but you can add more headings in this format ( h4[id], h5[id] ) or target any other class or id.
You can also check how to add a Table of content in WordPress without plugin here.
9. Style Bullet List
You can change the bullet point style using a Custom class and CSS code.
Suppose, You want to add an arrow like this as shown in the below images to the bullet list.

You can easily do that using CSS pseudo Element property. Follow the guide below to apply this effect.
Step-1: Add the below CSS code in the Additional CSS section.
ul.bullet-list {list-style-type: none;}
ul.bullet-list li {position: relative;}
ul.bullet-list li:before{
	content:"➤";
	position: absolute;
	left: -1.3em;
	color: #343E47;
}
Step-2: Now open your WordPress post editor and select the list block.
Step-3: Now in the Block setting click on Advanced and add the bullet-list class in the Additional CSS class.
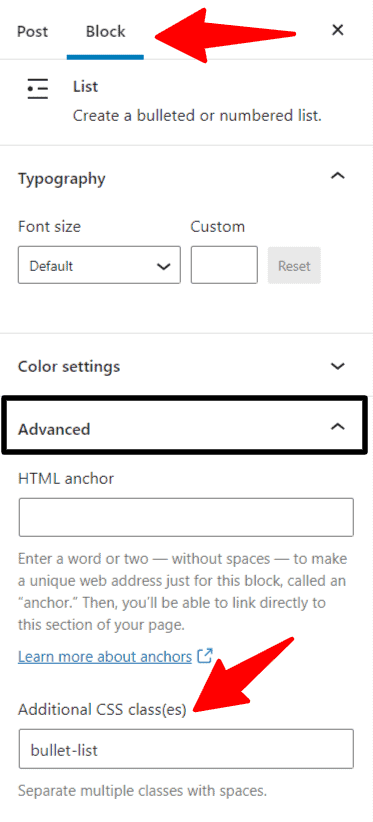
Now the new styling is added only to those lists where you add the additional CSS class (i.e. bullet-list).
You can also change the arrow style by replacing the Unicode(➤) in the CSS code. [ content:”➤”; ]
You can find Lots of Unicode by searching the right arrow unencodes. Or you can copy some of them from here.
List of right arrow Unicode: ➜, ➔, ➤, ➠, ➢, ➩, », ➲, 🡺, ⮞ etc.
Or you can use SVG icons in the bullet list by using the code below.
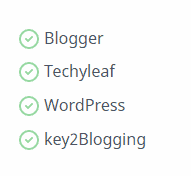
<div class="checkbox-items">
<ul >
  <li>Blogger</li>
  <li>Techyleaf</li>
  <li>WordPress</li>
  <li>key2Blogging</li>
</ul>
</div>

<style>
  .checkbox-items ul{ list-style-type: none;}
  .checkbox-items li:before{
    content: url("data:image/svg+xml, %3Csvg width='20' height='20' viewBox='0 0 20 20' fill='none' xmlns='http://www.w3.org/2000/svg'%3E%3Cpath d='M7 10L9 12L13 8M19 10C19 14.9706 14.9706 19 10 19C5.02944 19 1 14.9706 1 10C1 5.02944 5.02944 1 10 1C14.9706 1 19 5.02944 19 10Z' stroke='%2396D8A0' stroke-width='2' stroke-linecap='round' stroke-linejoin='round'/%3E%3C/svg%3E");
    background: no-repeat;
    margin-right:5px;
    margin-top:5px;
  }
 .checkbox-items ul li {
    display: flex;
    align-items: flex-start;
}
</style>
Read Also:
- How to highlight text in WordPress (without Plugin)
- How to add a button in the Navigation menu in WordPress (using CSS)
10. Style Table heading
In WordPress Table block you can add table headings and change the background color. But, You don’t see any option to change the heading color. So, you can easily do that by using a CSS code.
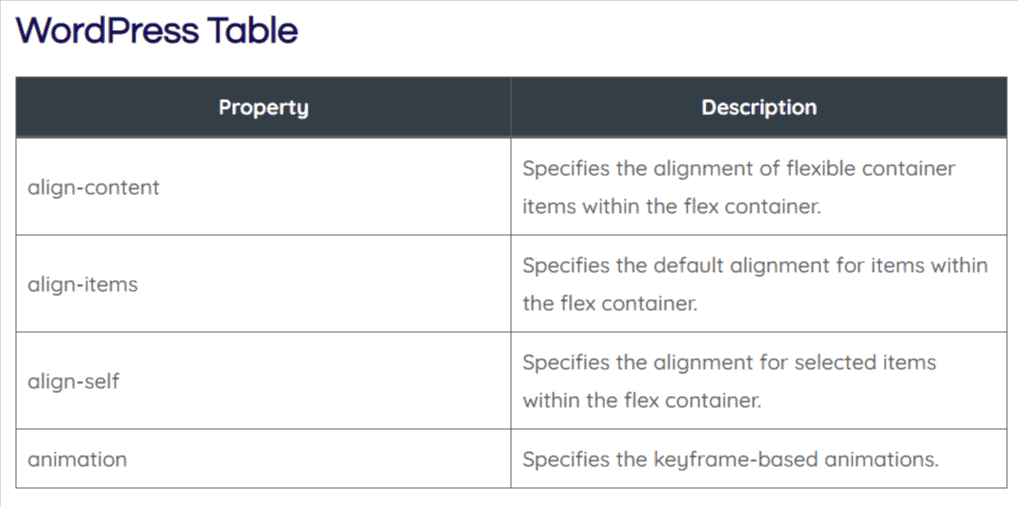
Here, I have added a black color heading using the CSS code given below.
/*responsive tables*/
 thead {
     background-color: #343e47;
     color: #ffffff;
}
Here you can change the heading color by changing the background-color (#343e47) and text color (#ffffff) according to your website brand color.
Conclusion
I hope this article helps you customize your WordPress website using CSS code. Most of the codes will work perfectly for all themes and some of them are for Generatepress, but you can use it on any website by changing the Class.
If you have any doubts regarding WordPress customization or CSS tricks, let me know in the comment section.
You can also check more WordPress Tutorials on my YouTube Channel Here. Thanks.👍


Great CSS tricks you got here, thank you very much! I’d love some more CSS tricks for GeneratePress, such as customizing the comment section, better hover on links, and mobile header customization.
Amazing CSS tricks you shared here, thanks.